Christmas decorating can cost a fortune. Store-bought ornaments and fancy garlands eat up your budget fast, and you’re left wondering if it’s worth it.
You don’t need expensive store decorations to make your home festive.
Homemade Christmas decorations bring heat and personality that mass-produced items can’t match.
Making them yourself saves money and creates memories with your family.
This blog defines simple ways to create beautiful tree decorations and beyond, using materials you already have at home.
Crafting with A Group? Here Are Some Tips that Help
Group crafting sessions turn decoration-making into a fun social event.
- Choose projects that don’t require advanced skills so everyone can participate.
- Prepare all materials in advance and organize them in separate stations.
- Set up a large workspace with enough room for everyone to move comfortably.
- Have extra supplies on hand in case someone makes a mistake.
- Play festive music in the background to set a cheerful mood.
- Provide simple refreshments that won’t interfere with crafting.
- Keep instructions printed out at each workstation for reference.
- Assign one person to help troubleshoot if others get stuck.
- Take photos throughout the session to capture the memories.
- Plan a show-and-tell at the end where everyone displays their creations.
Homemade Christmas Decorations Ideas – Make them at Home
Creating your own Christmas decorations brings joy to your home and saves you money, too.
1. Cinnamon Stick Stars
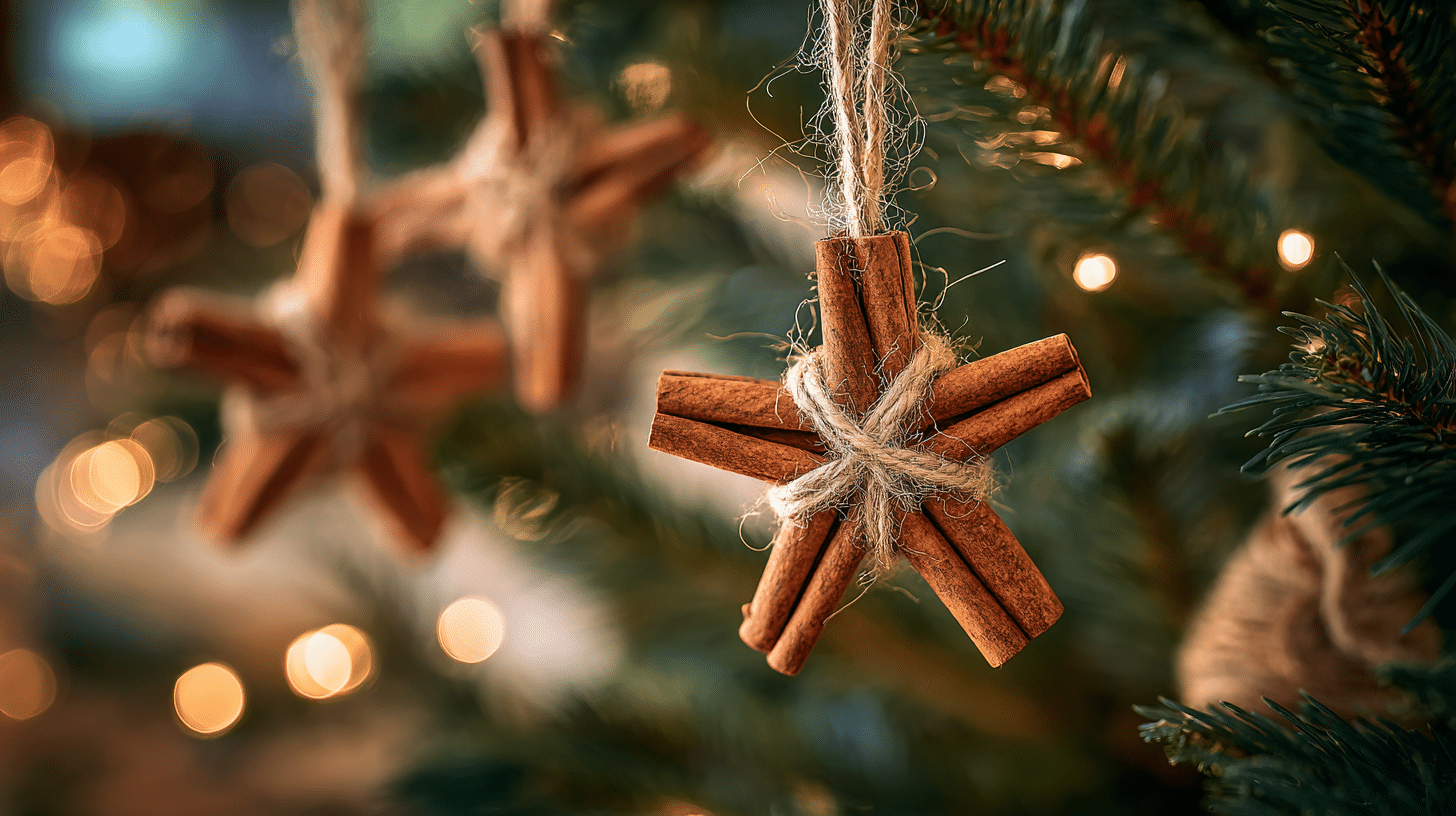
These stars smell wonderful and look great on your tree. They’re simple to make and last for years if you store them properly.
Materials Required: Cinnamon sticks, hot glue gun, twine or ribbon, and scissors.
Step-by-step process:
- Step 1: Arrange five cinnamon sticks in a star shape.
- Step 2: Glue each intersection point securely.
- Step 3: Tie twine around one point to hang.
2. Paper Snowflakes
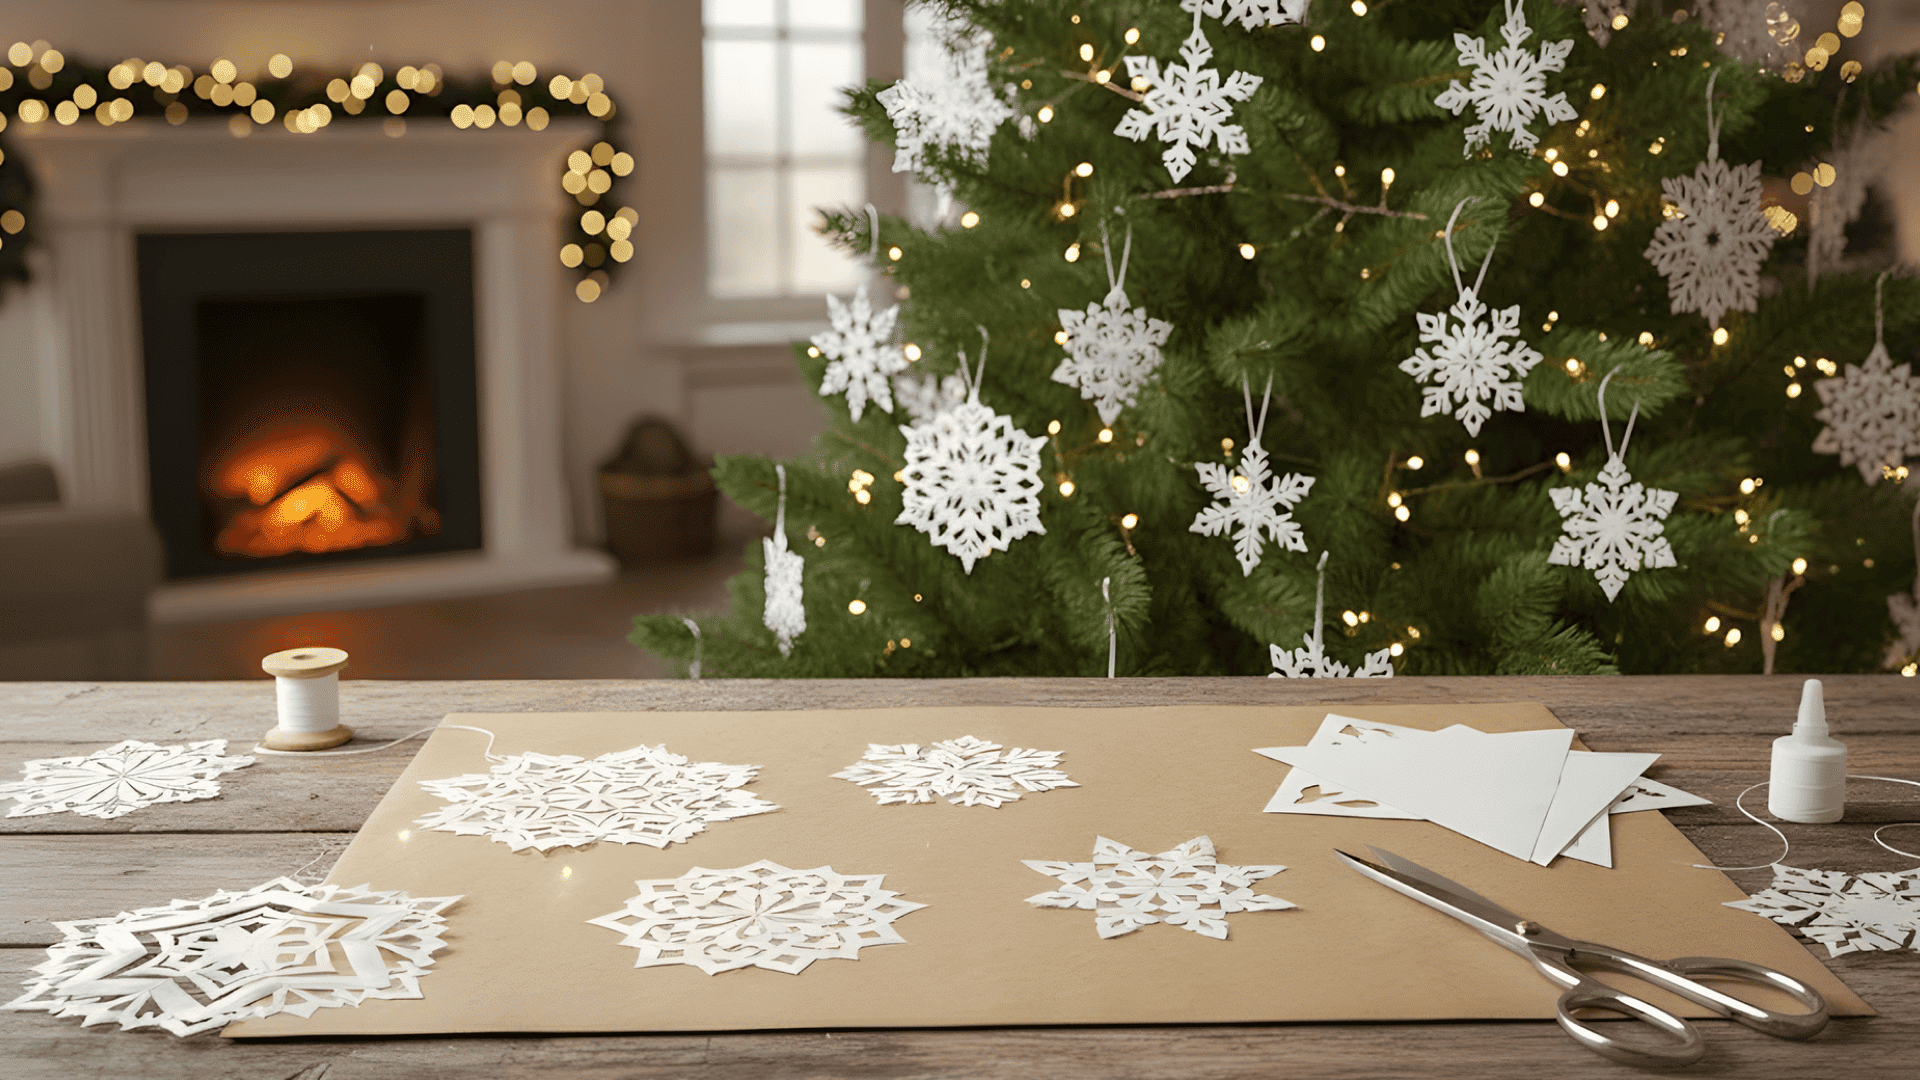
Paper snowflakes are classic decorations that never go out of style.
Make dozens of these each year and hang them in windows. Kids love helping with this project.
Materials Required: White paper, scissors, a pencil, and a string.
Step-by-step process:
- Step 1: Fold the paper into a triangle multiple times.
- Step 2: Draw your pattern on the folded paper.
- Step 3: Cut along your lines carefully.
- Step 4: Unfold to reveal your snowflake.
- Step 5: Attach a string for hanging.
3. Pine Cone Ornaments
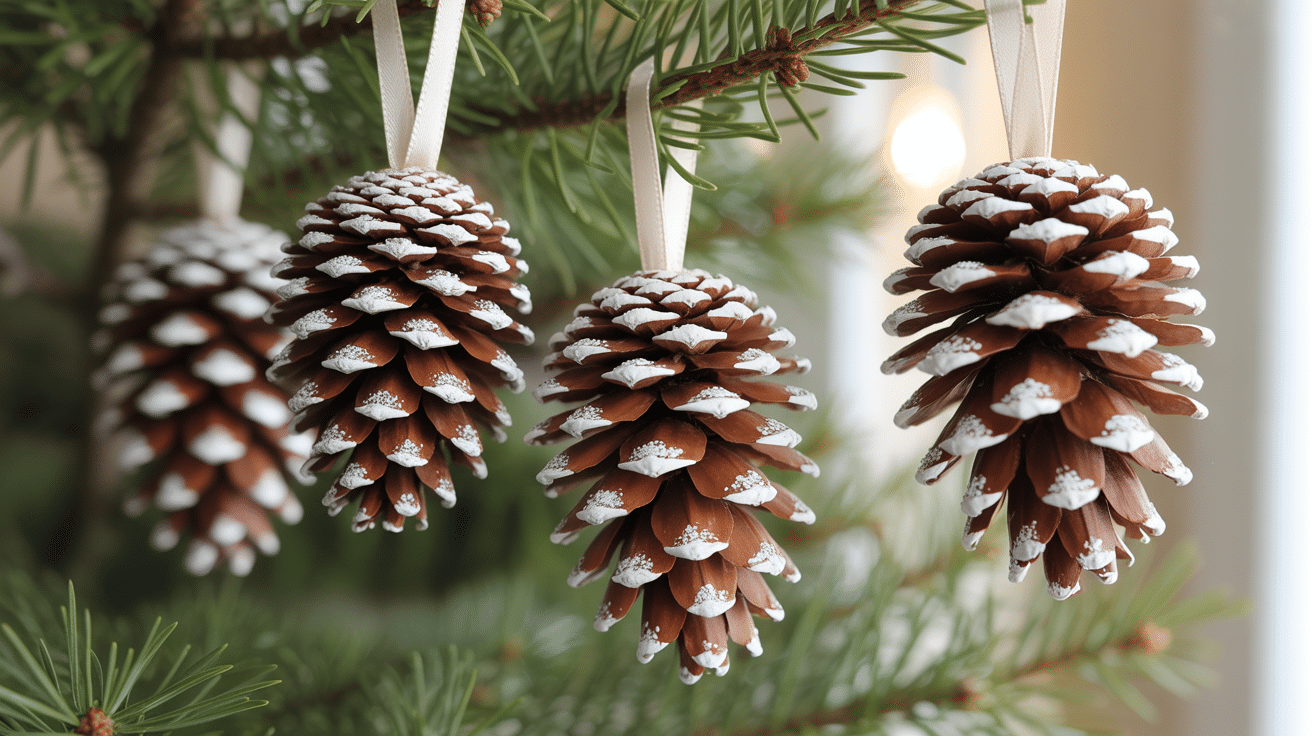
Pine cones bring nature indoors and cost nothing if you collect them yourself. They look beautiful with just a little paint or glitter added.
Materials Required: Pine cones, white paint or spray paint, glitter, ribbon, and hot glue.
Step-by-step process:
- Step 1: Clean pine cones and let them dry.
- Step 2: Paint the tips white for a snowy effect.
- Step 3: Apply glue to painted areas while wet.
- Step 4: Sprinkle glitter over the glue.
- Step 5: Attach ribbon to the top.
4. Mason Jar Snow Globes
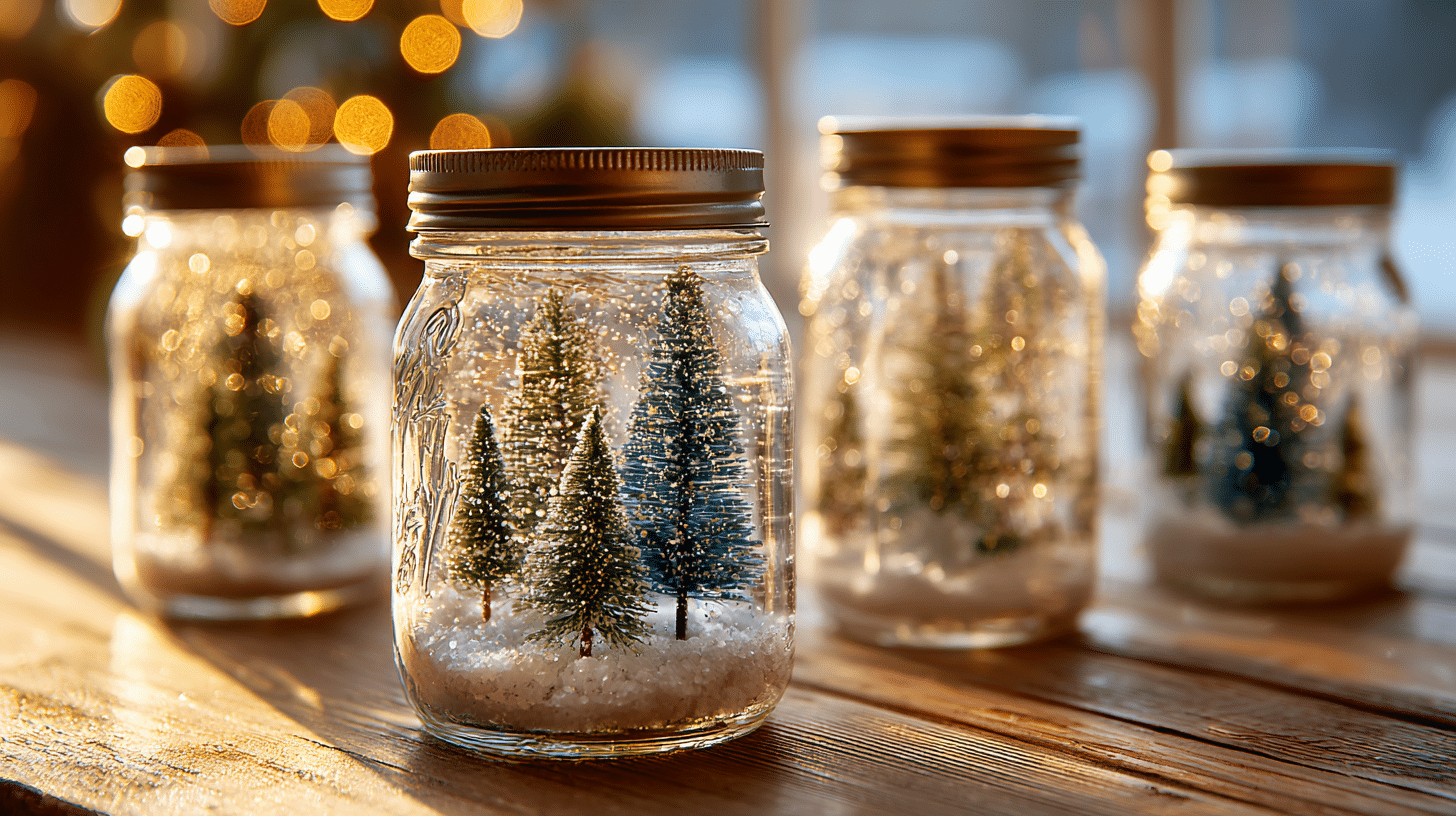
These charming snow globes add magic to any shelf or mantel. Fill them with tiny trees and fake snow for a winter wonderland feel.
Materials Required: Mason jars, small figurines or trees, glycerin, glitter, hot glue, and water.
Step-by-step process:
- Step 1: Glue figurines to the inside of the lid.
- Step 2: Let the glue dry overnight.
- Step 3: Fill the jar with water and glycerin.
- Step 4: Add glitter to the water.
- Step 5: Screw the lid on tightly.
- Step 6: Shake gently to test.
- Step 7: Flip upside down to display.
5. Felt Gingerbread Men
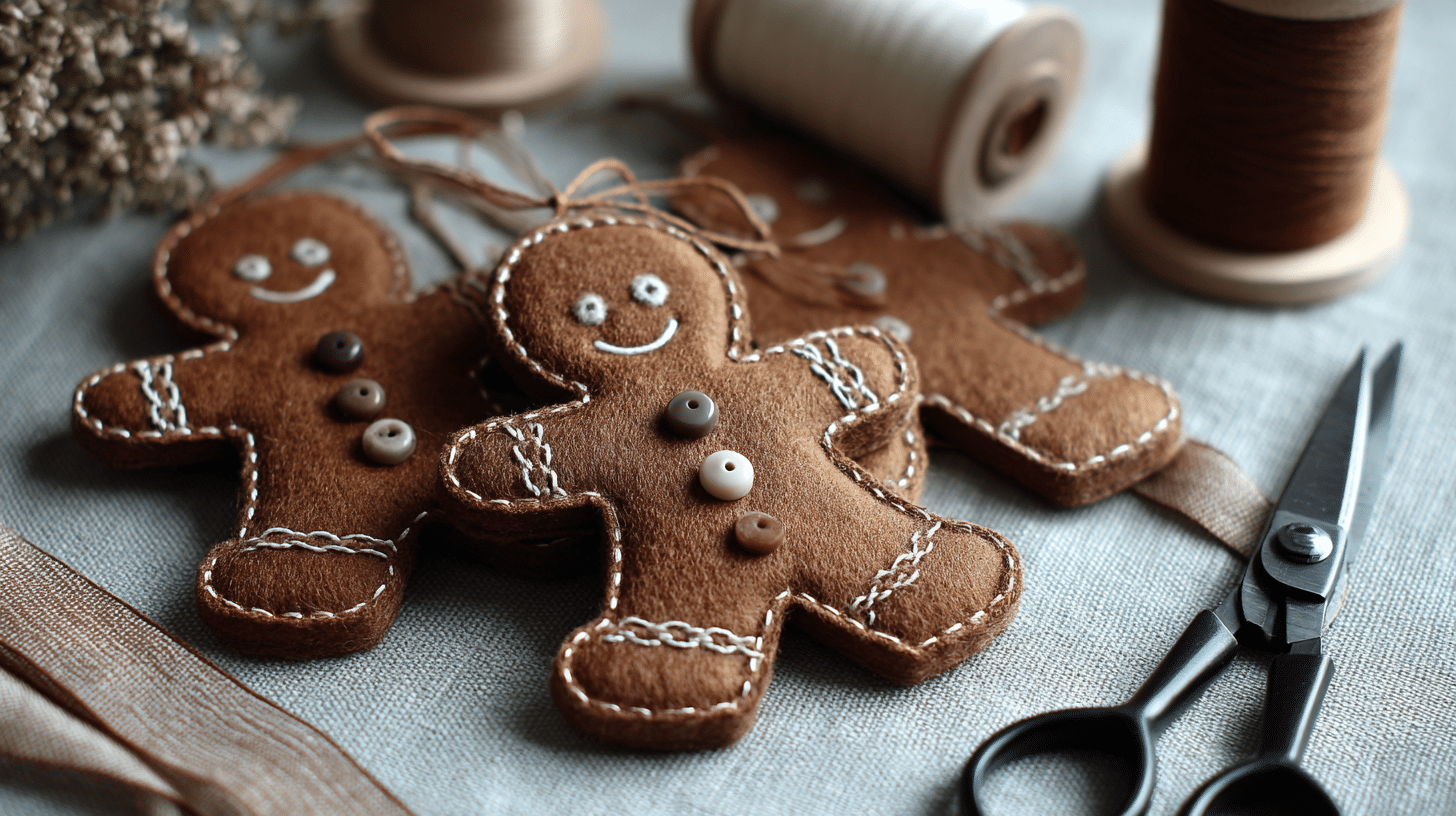
Felt gingerbread ornaments are adorable and safe for homes with small children. They’re soft and won’t break if they fall.
Materials Required: Brown felt, white embroidery thread, needle, buttons, ribbon, scissors, and fabric glue.
Step-by-step process:
- Step 1: Cut gingerbread man shapes from felt.
- Step 2: Stitch white details for icing.
- Step 3: Glue small buttons as decorations.
- Step 4: Attach a ribbon loop at the top.
6. Orange Slice Garland
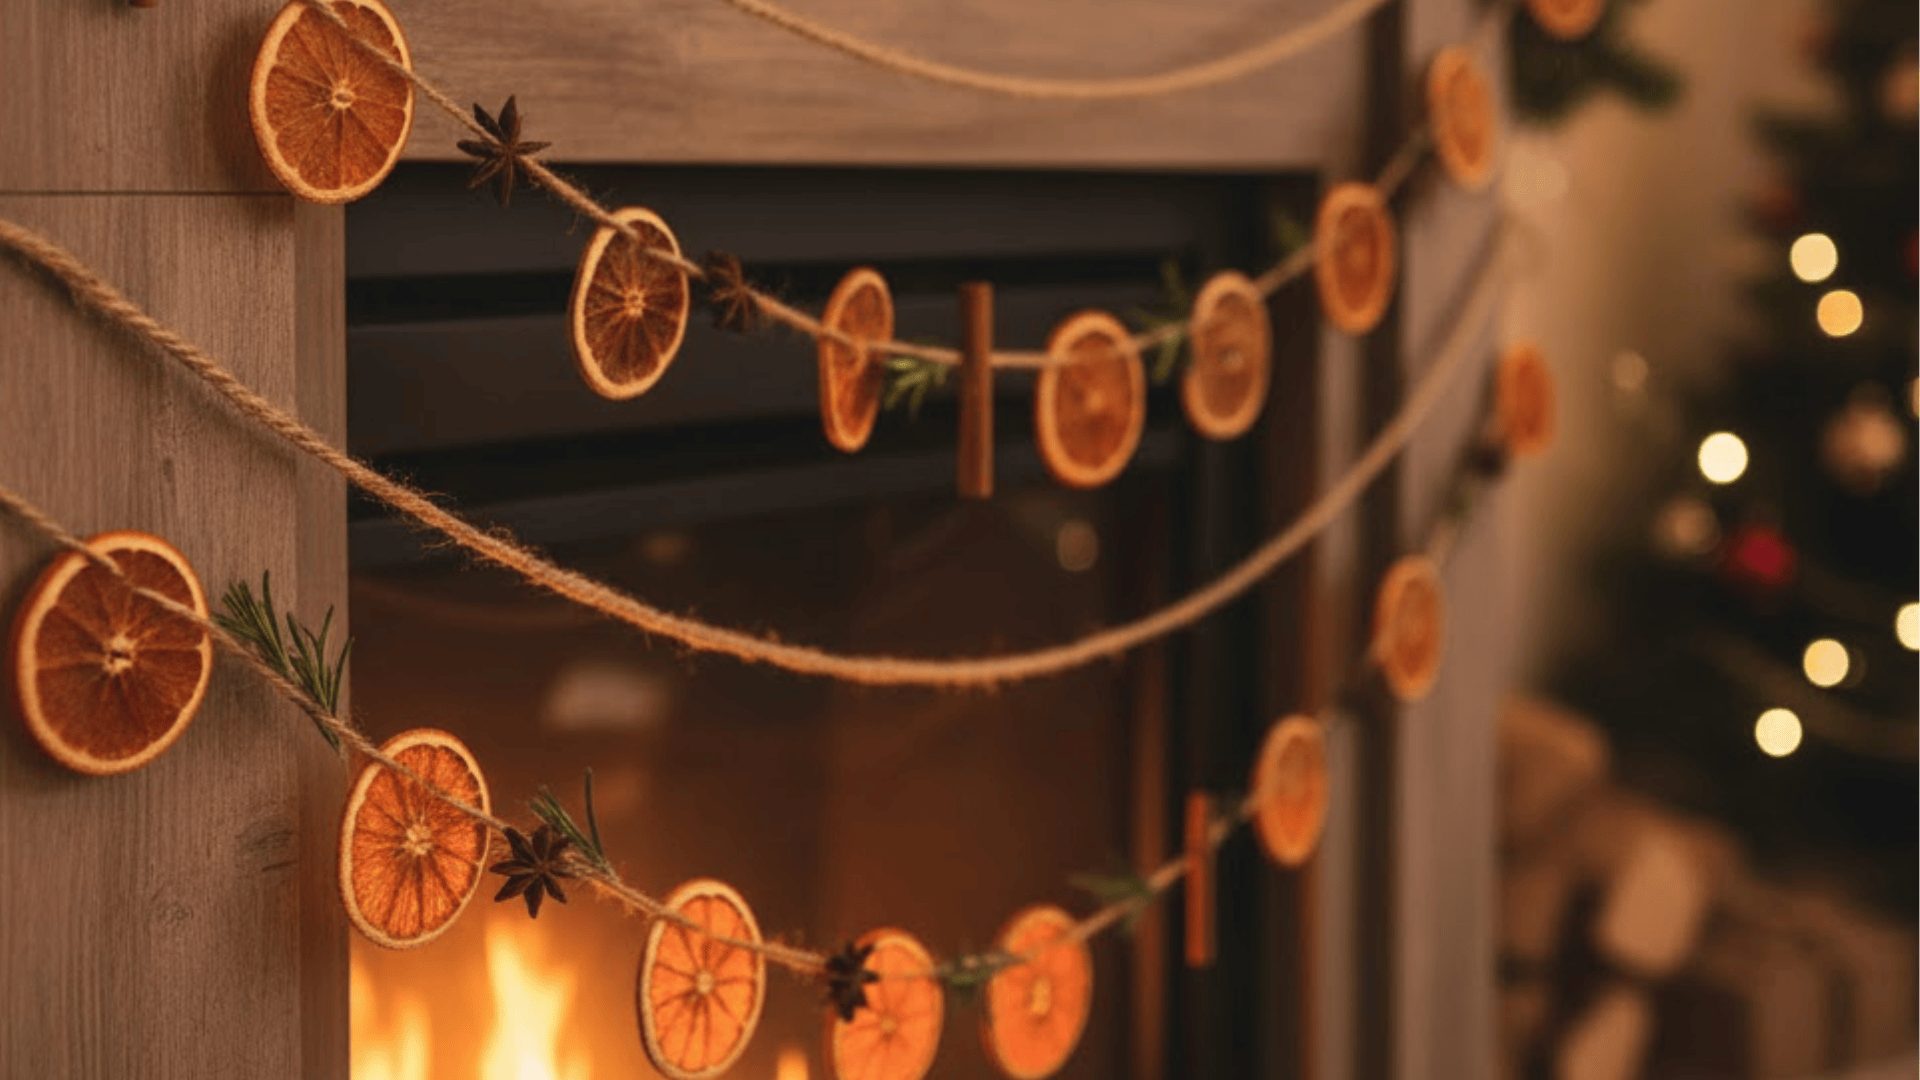
Dried orange slices smell wonderful and look pretty when strung together. This garland brings a cozy feeling to your space.
Materials Required: Oranges, a knife, a baking sheet, parchment paper, twine, and a needle.
Step-by-step process:
- Step 1: Slice oranges into thin rounds.
- Step 2: Place on parchment-lined baking sheet.
- Step 3: Bake at 200°F for three hours.
- Step 4: Thread twine through slices with needle.
- Step 5: Space them evenly along the string.
- Step 6: Hang across your mantel or doorway.
7. Bottle Brush Tree Display
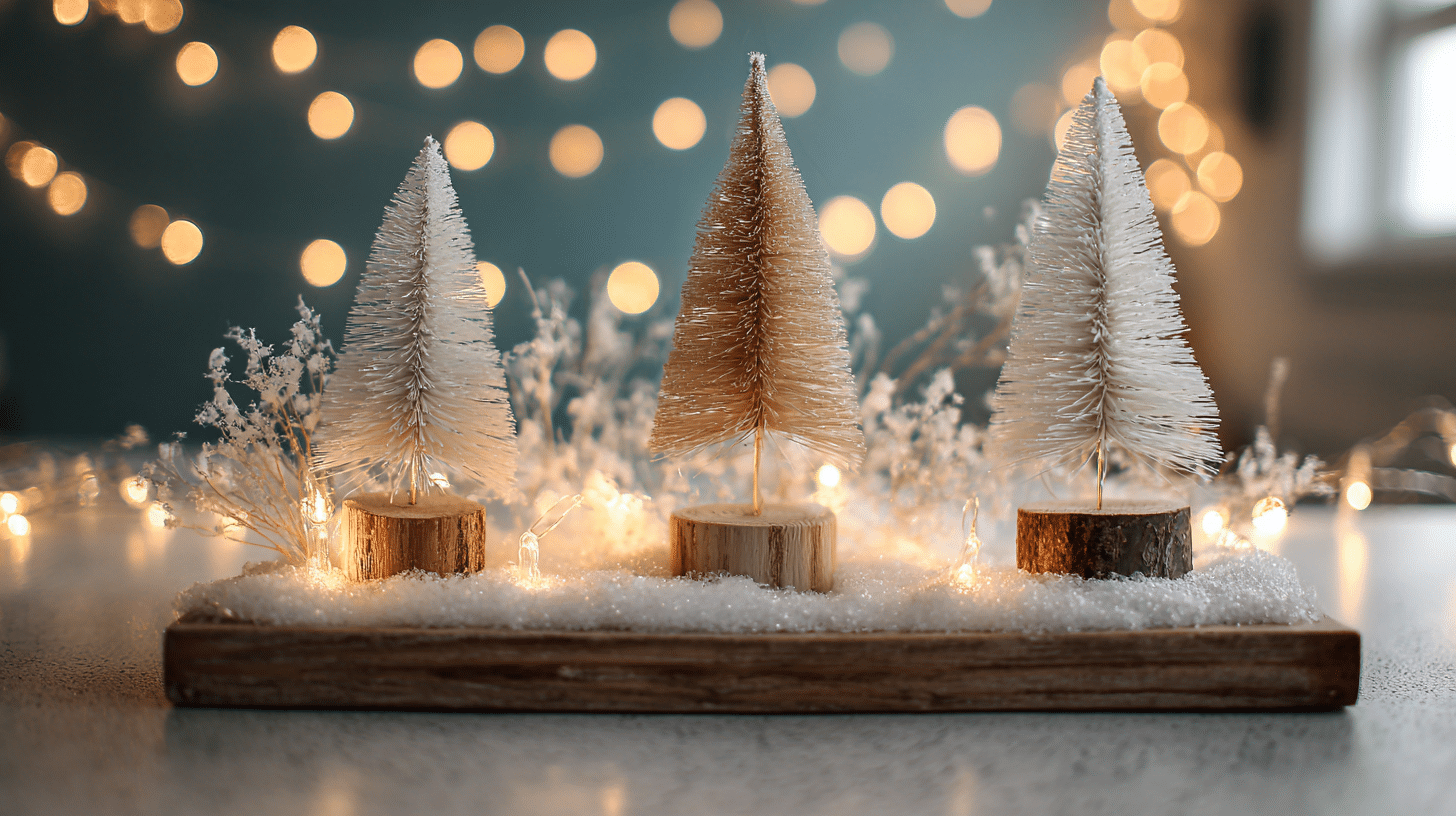
Small bottle brush trees create a vintage Christmas village scene. Arrange them on a tray with fake snow for a festive centerpiece.
Materials Required: Small bottle brush trees, white paint, glitter, wooden blocks or slices, and hot glue.
Step-by-step process:
- Step 1: Paint tree tips with white paint.
- Step 2: Sprinkle glitter while the paint is wet.
- Step 3: Glue trees to wooden bases.
- Step 4: Arrange on a tray or shelf.
- Step 5: Add fake snow around the bases.
8. Burlap Ribbon Bows
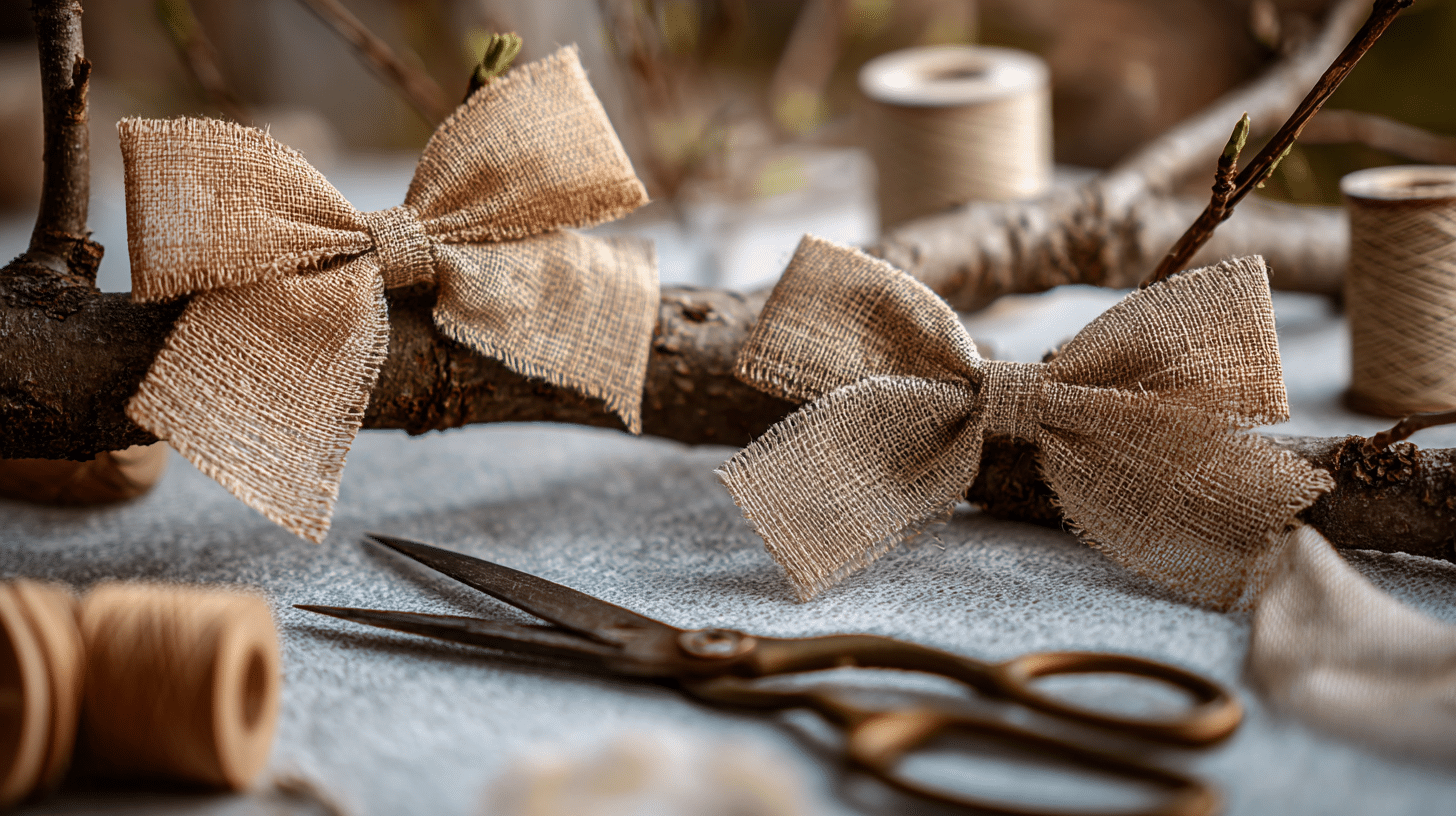
Burlap bows add a farmhouse touch to your tree or wreaths. They’re easy to make once you get the hang of the technique.
Materials Required: Burlap ribbon, wire, scissors, and ruler.
Step-by-step process:
- Step 1: Cut ribbon to desired length.
- Step 2: Make loops on each side.
- Step 3: Pinch the center together.
- Step 4: Wrap the wire around the middle.
- Step 5: Fluff loops to shape.
- Step 6: Trim ribbon ends diagonally.
9. Popsicle Stick Snowflakes

These snowflakes are perfect for kids to make and decorate. Let children paint them however they want.
Materials Required: Popsicle sticks, white paint, glue, glitter, and ribbon.
Step-by-step process:
- Step 1: Arrange sticks in a snowflake pattern.
- Step 2: Glue all intersections together.
- Step 3: Paint the entire snowflake white.
- Step 4: Add glitter while the paint is wet.
- Step 5: Attach ribbon for hanging.
10. Cranberry and Popcorn Garland
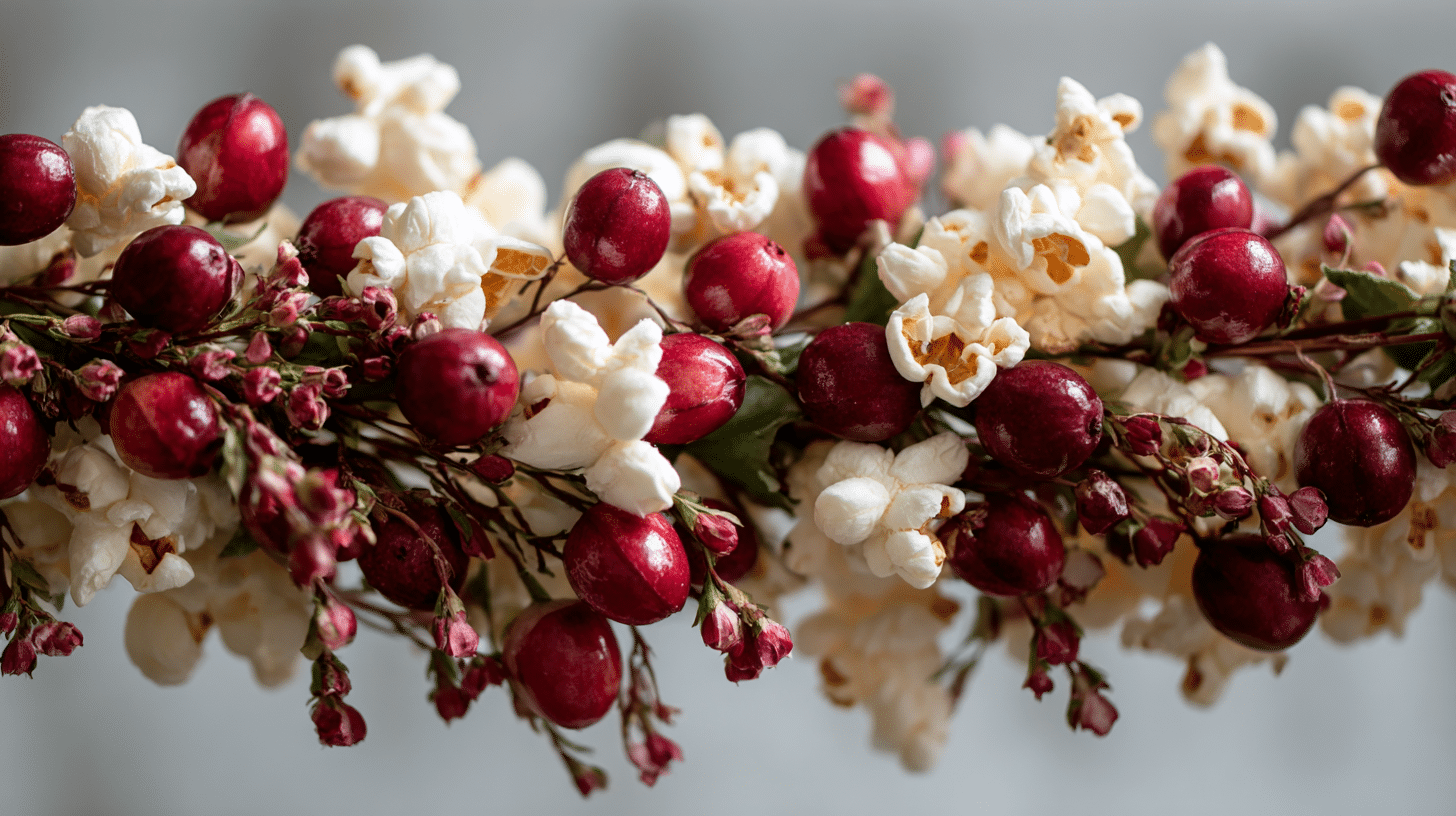
This traditional garland is edible and beautiful. Birds will enjoy it if you hang it outside after Christmas.
Materials Required: Fresh cranberries, popped popcorn, needle, strong thread, and scissors.
Step-by-step process:
- Step 1: Thread the needle with a long piece of thread.
- Step 2: Alternate cranberries and popcorn.
- Step 3: Push items close together.
- Step 4: Continue until the desired length.
- Step 5: Tie off ends securely.
- Step 6: Hang on the tree or the mantel.
- Step 7: Keep in a cool area to stay fresh.
11. Wine Cork Reindeer
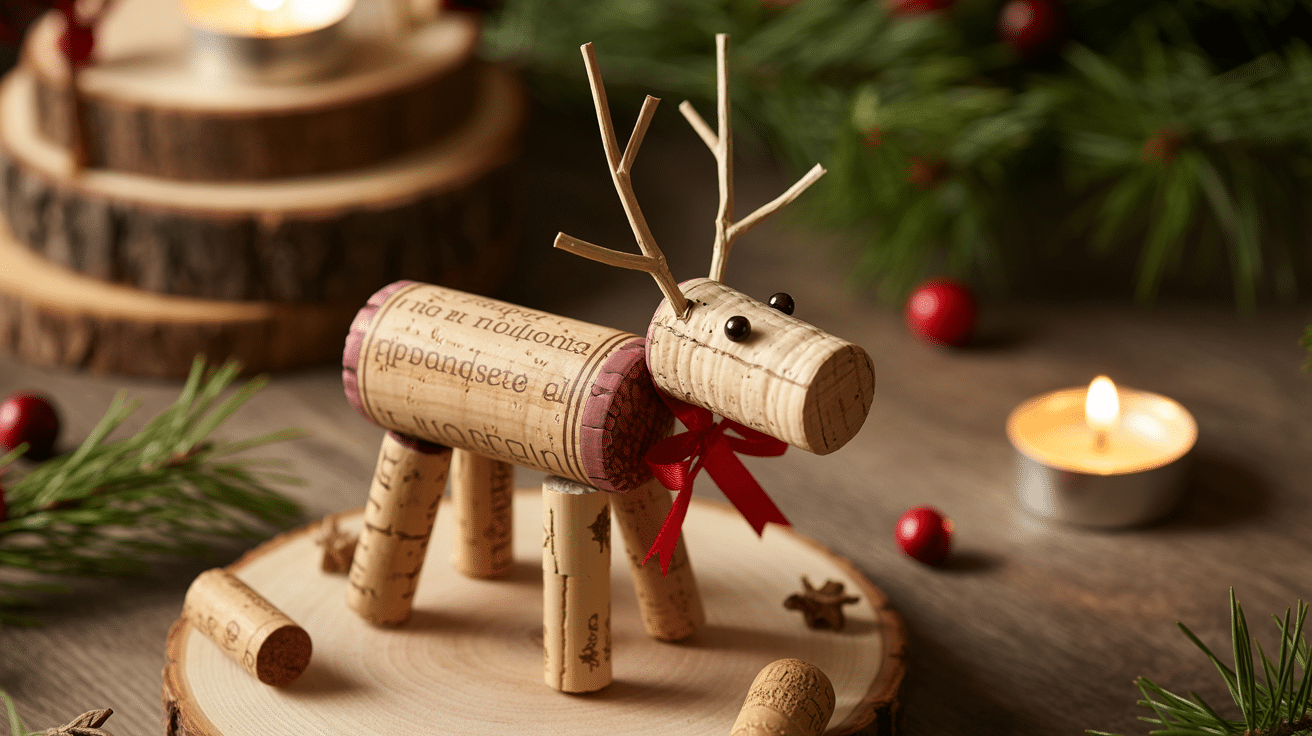
Save your wine corks for these cute reindeer ornaments. They’re quirky and fun conversation starters.
Materials Required: Wine corks, small twigs, googly eyes, red pom poms, hot glue, and ribbon.
Step-by-step process:
- Step 1: Glue two corks together for the body and head.
- Step 2: Attach twig pieces as antlers.
- Step 3: Glue on googly eyes.
- Step 4: Add red pom pom nose.
- Step 5: Tie ribbon around neck.
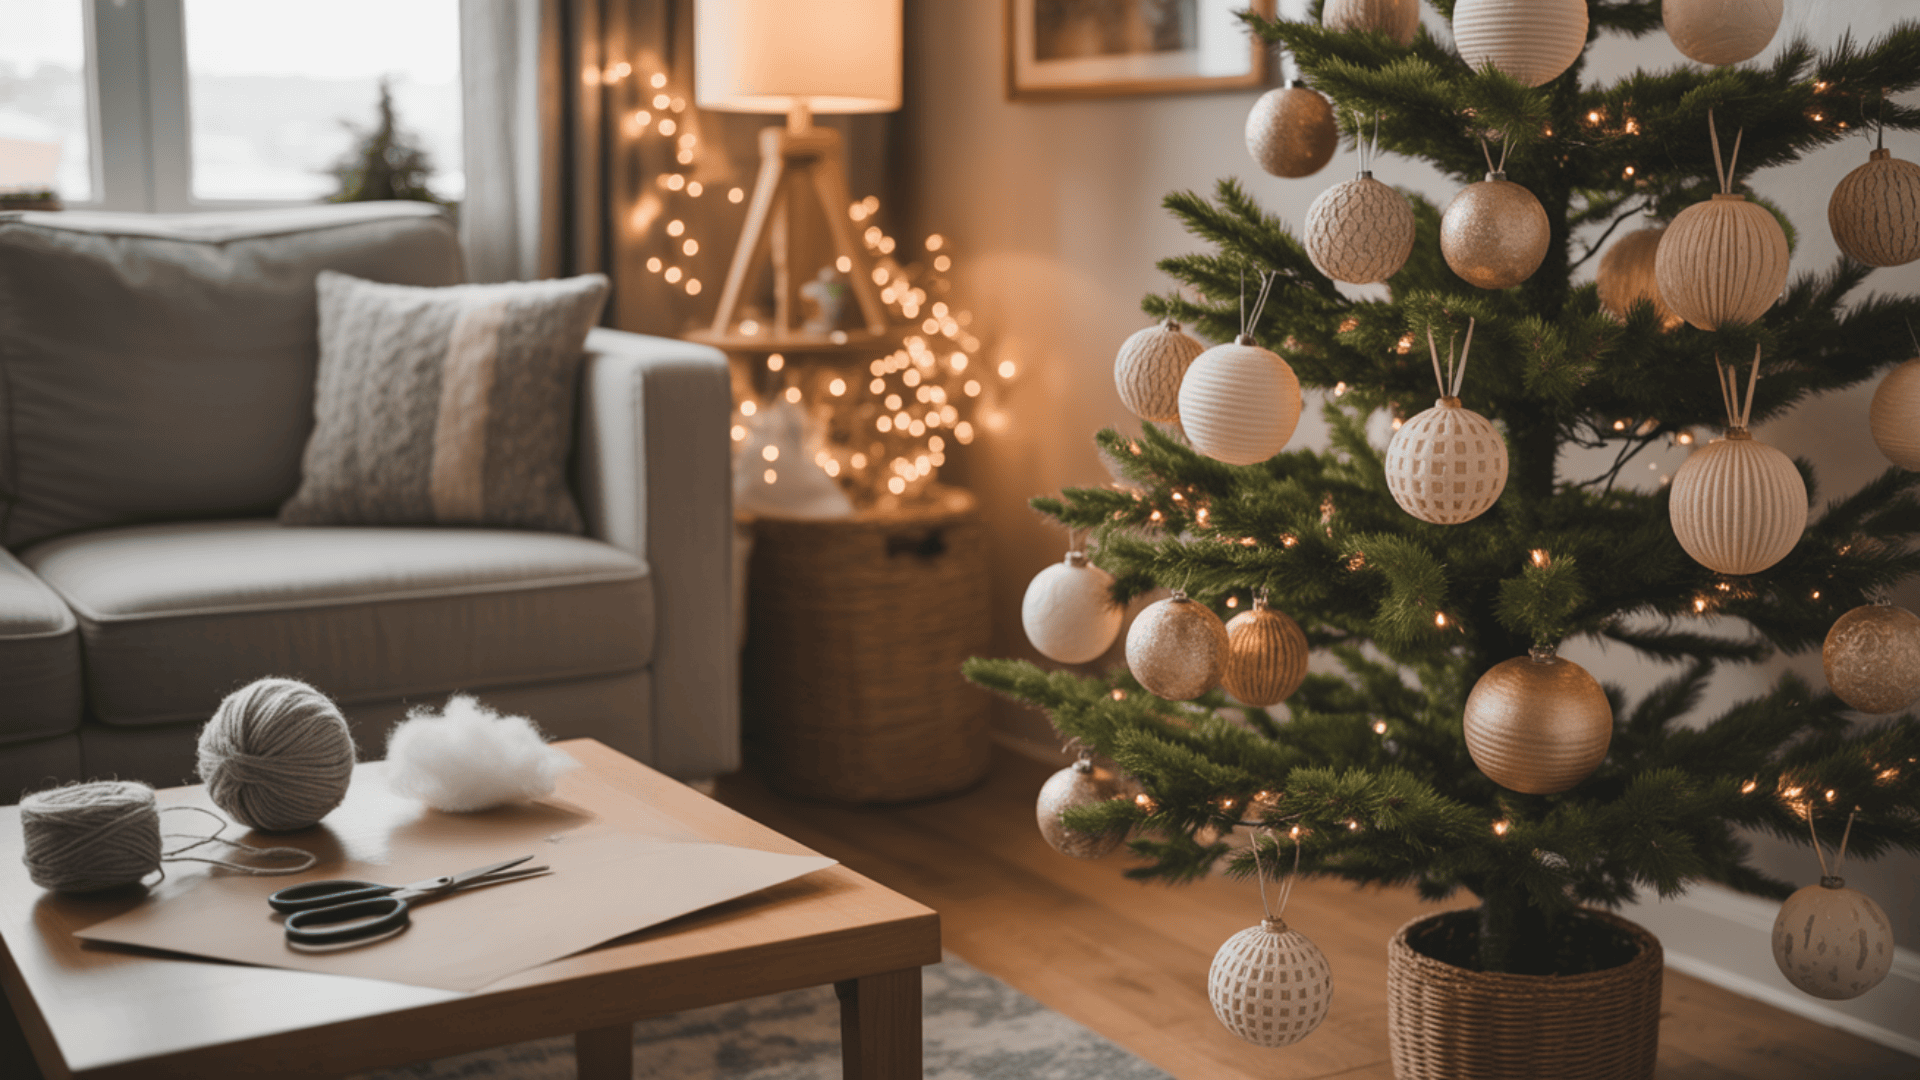
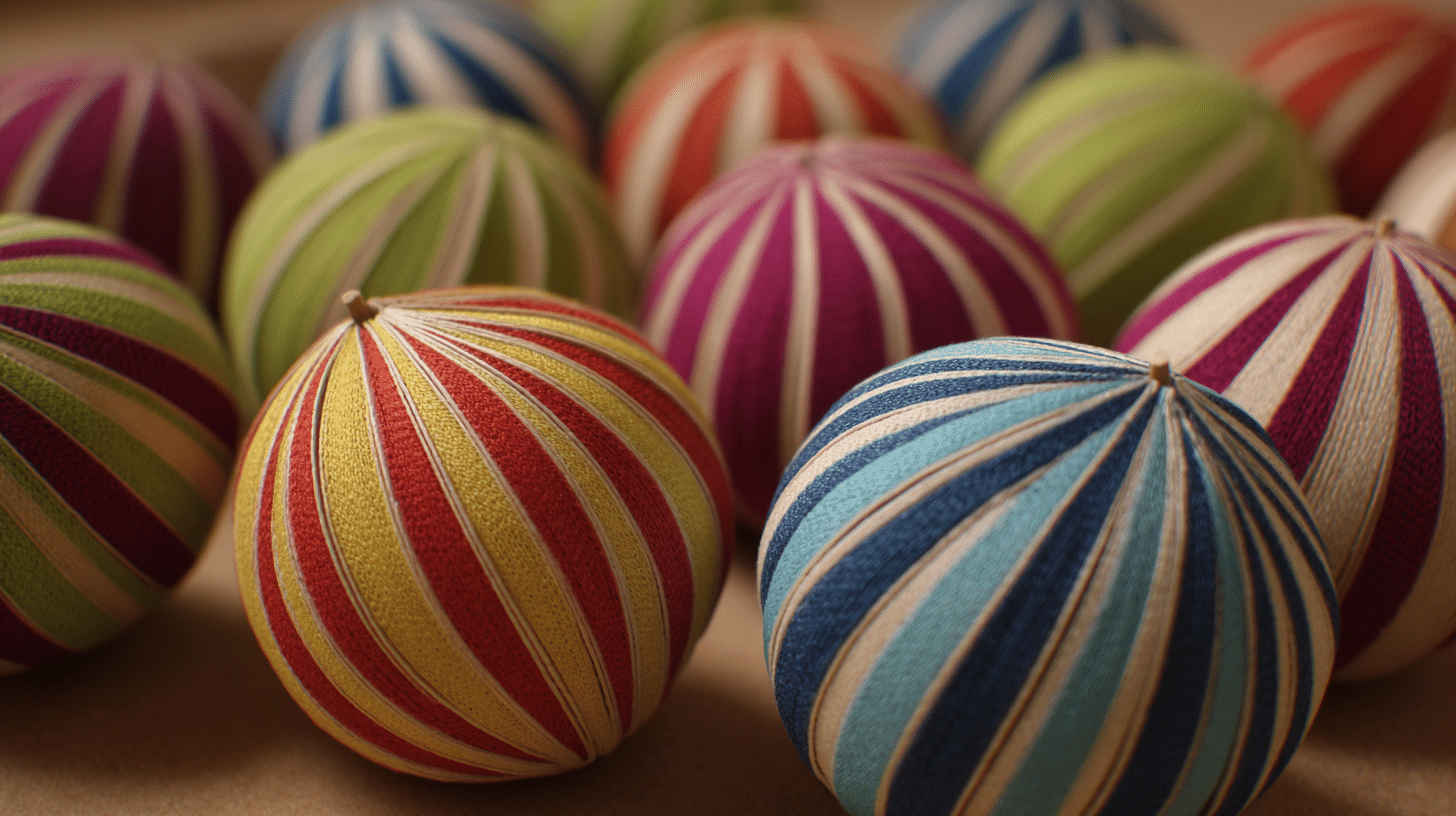
12. Yarn-Wrapped Ornaments
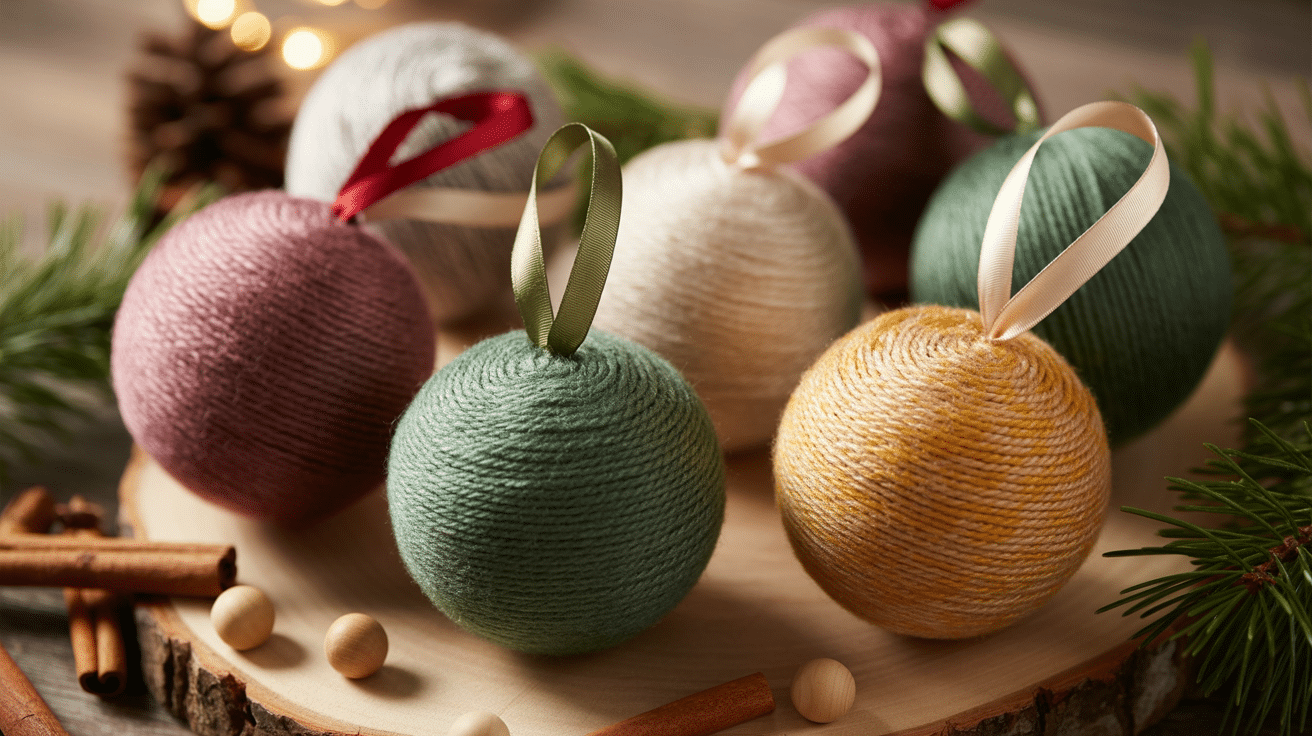
These soft ornaments add texture to your tree. You can use any colors to match your decor theme.
Materials Required: Styrofoam balls, yarn in various colors, pins, ribbon, and scissors.
Step-by-step process:
- Step 1: Pin the yarn end to the ball.
- Step 2: Wrap yarn around the ball tightly.
- Step 3: Continue until the ball is covered.
- Step 4: Secure the end with another pin.
- Step 5: Attach ribbon loop for hanging.
- Step 6: Remove pins if desired.
13. Clothespin Angels
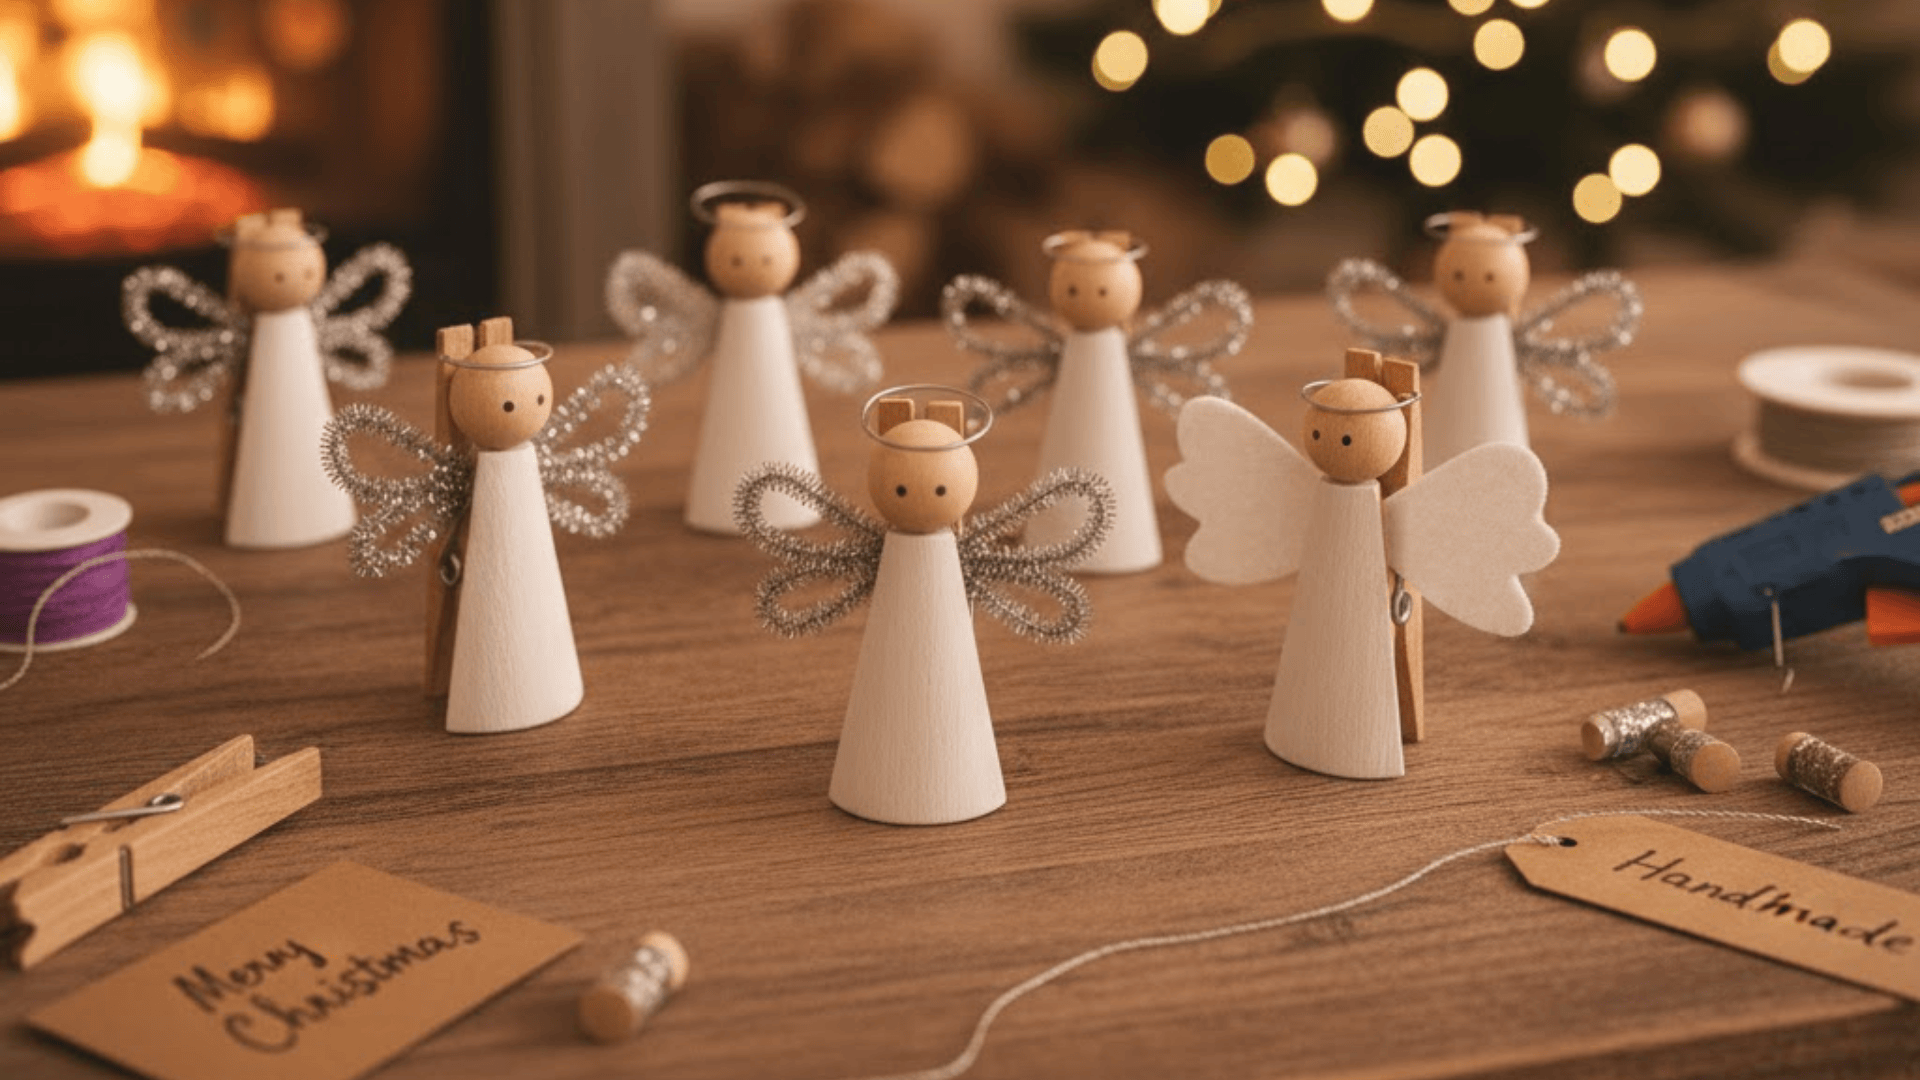
These little angels are sweet and straightforward. Make them as gifts for neighbors and friends.
Materials Required: Wooden clothespins, white felt, gold pipe cleaners, wooden beads, hot glue, and markers.
Step-by-step process:
- Step 1: Glue a wooden bead on top of the clothespin.
- Step 2: Draw a face on the bead with markers.
- Step 3: Cut felt into dress shape.
- Step 4: Glue the dress to the clothespin body.
- Step 5: Form a pipe cleaner into a halo.
- Step 6: Attach halo above head.
- Step 7: Cut felt wings and glue them on the back.
14. Pinecone Fire Starters with Bows
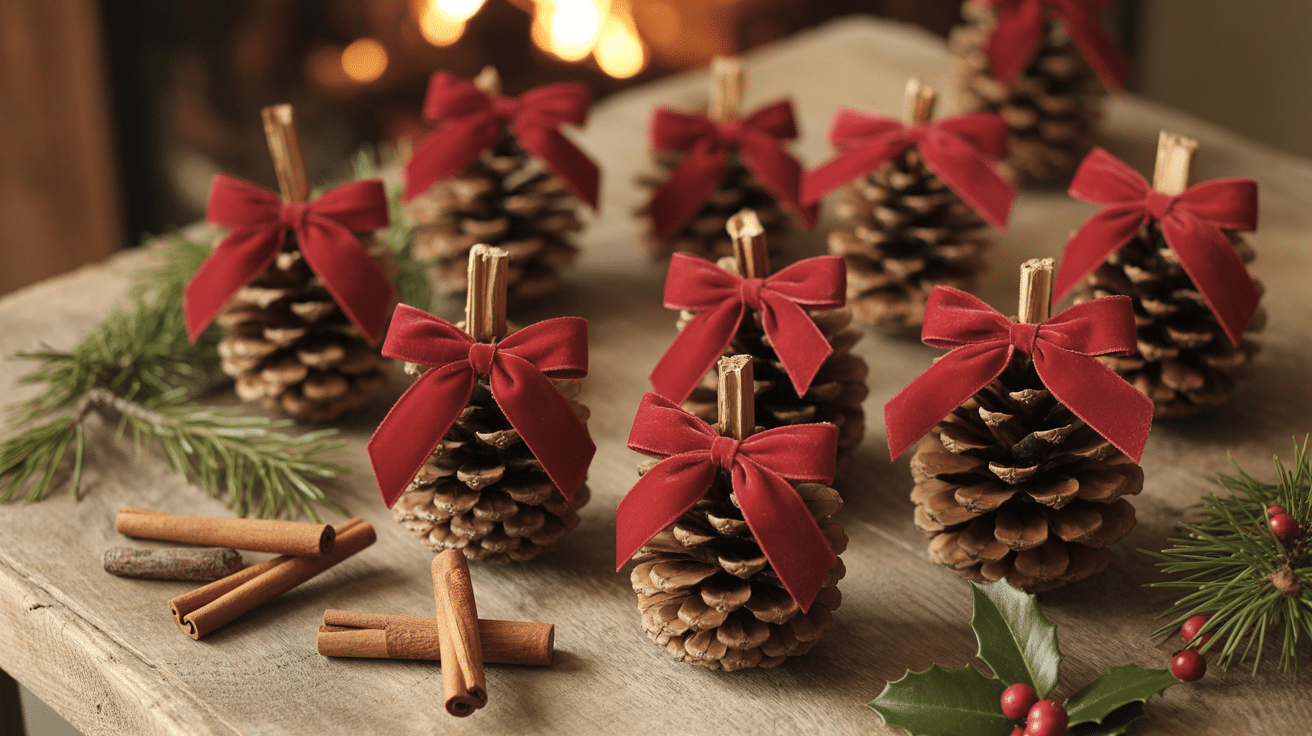
These serve as decorations and practical fire starters. They look pretty in a basket by the fireplace.
Materials Required: Pine cones, wax or old candles, double boiler, ribbon, and essential oils (optional).
Step-by-step process:
- Step 1: Melt wax in a double boiler.
- Step 2: Add essential oils if desired.
- Step 3: Dip pine cones in melted wax.
- Step 4: Let excess wax drip off.
- Step 5: Place on wax paper to dry.
- Step 6: Tie ribbon around each cone.
15. Salt Dough Ornaments
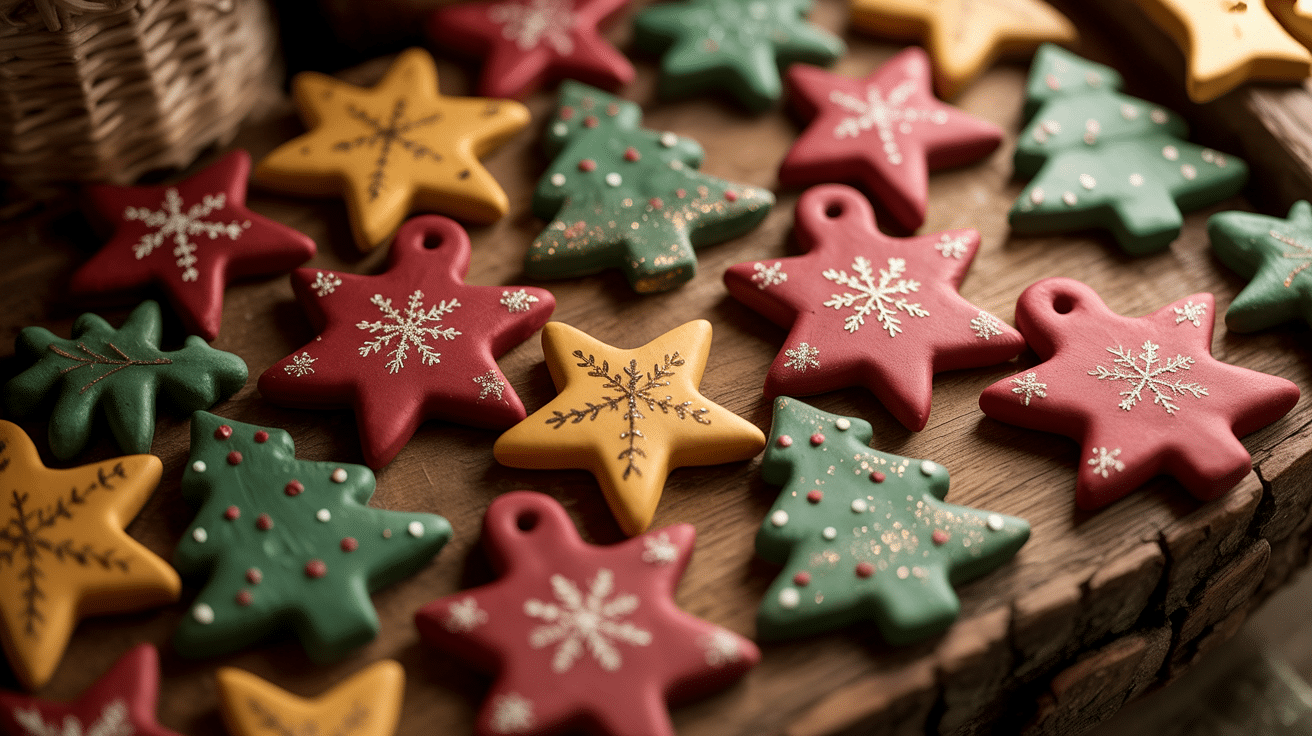
Salt dough ornaments are a childhood favorite. Make these every year with new cookie-cutter shapes.
Materials Required: Flour, salt, water, cookie cutters, paint, ribbon, and rolling pin.
Step-by-step process:
- Step 1: Mix two cups of flour, one cup of salt, and one cup of water.
- Step 2: Knead the dough until smooth.
- Step 3: Roll out to a quarter-inch thickness.
- Step 4: Cut shapes with cookie cutters.
- Step 5: Poke a hole for the ribbon.
- Step 6: Bake at 250°F for two hours.
- Step 7: Let cool and paint.
- Step 8: Thread ribbon through the hole.
16. Birch Log Candle Holders

These rustic candle holders bring woodland charm to your table. They’re perfect for a natural Christmas look.
Materials Required: Birch log slices, drill with a vital bit, tea light candles, and sandpaper.
Step-by-step process:
- Step 1: Sand the log slice smooth.
- Step 2: Drill a hole in the center for the candle.
- Step 3: Make a hole slightly smaller than the candle.
- Step 4: Place a tea light in the hole.
17. Fabric Scrap Garland
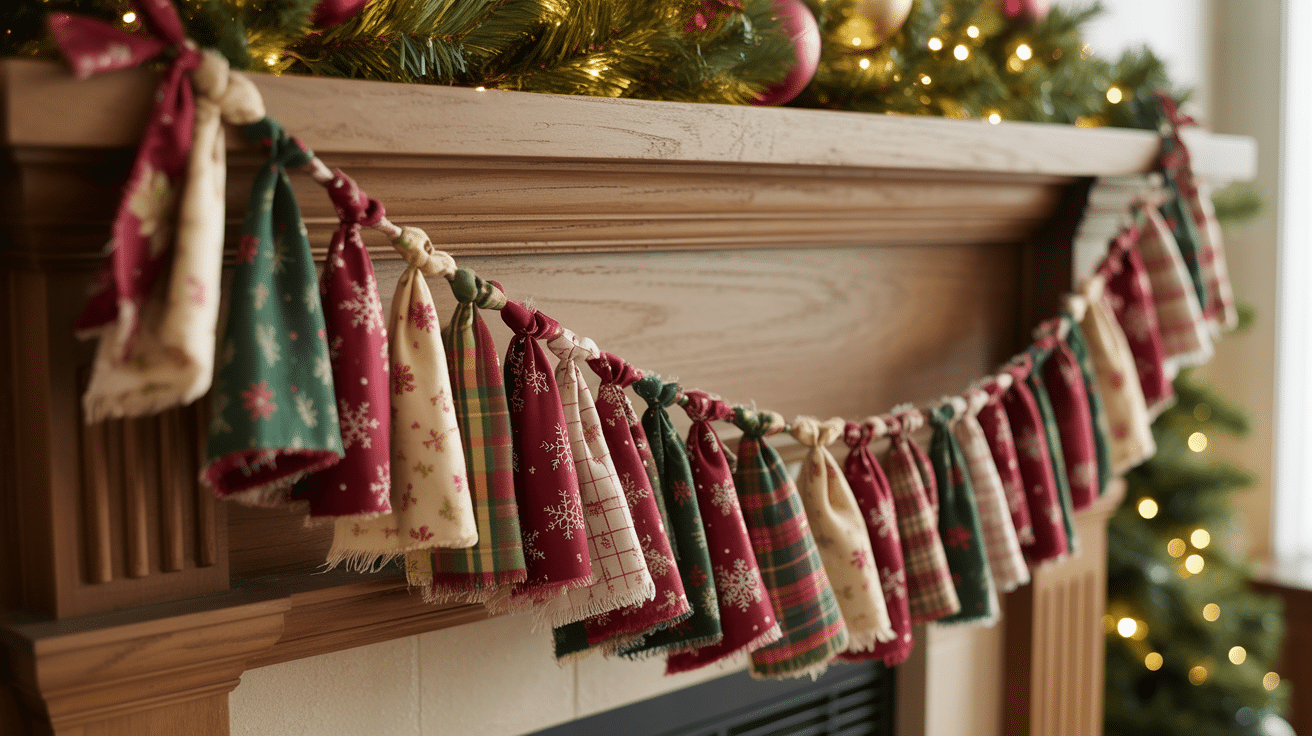
Use up fabric scraps with this colorful garland. It adds a cozy, homemade feel to any room.
Materials Required: Fabric scraps, scissors, twine or ribbon, and a ruler.
Step-by-step process:
- Step 1: Cut fabric into strips.
- Step 2: Make strips about one inch wide.
- Step 3: Tie strips onto twine.
- Step 4: Space them evenly along the string.
- Step 5: Hang across your room.
18. Button Wreath Ornaments
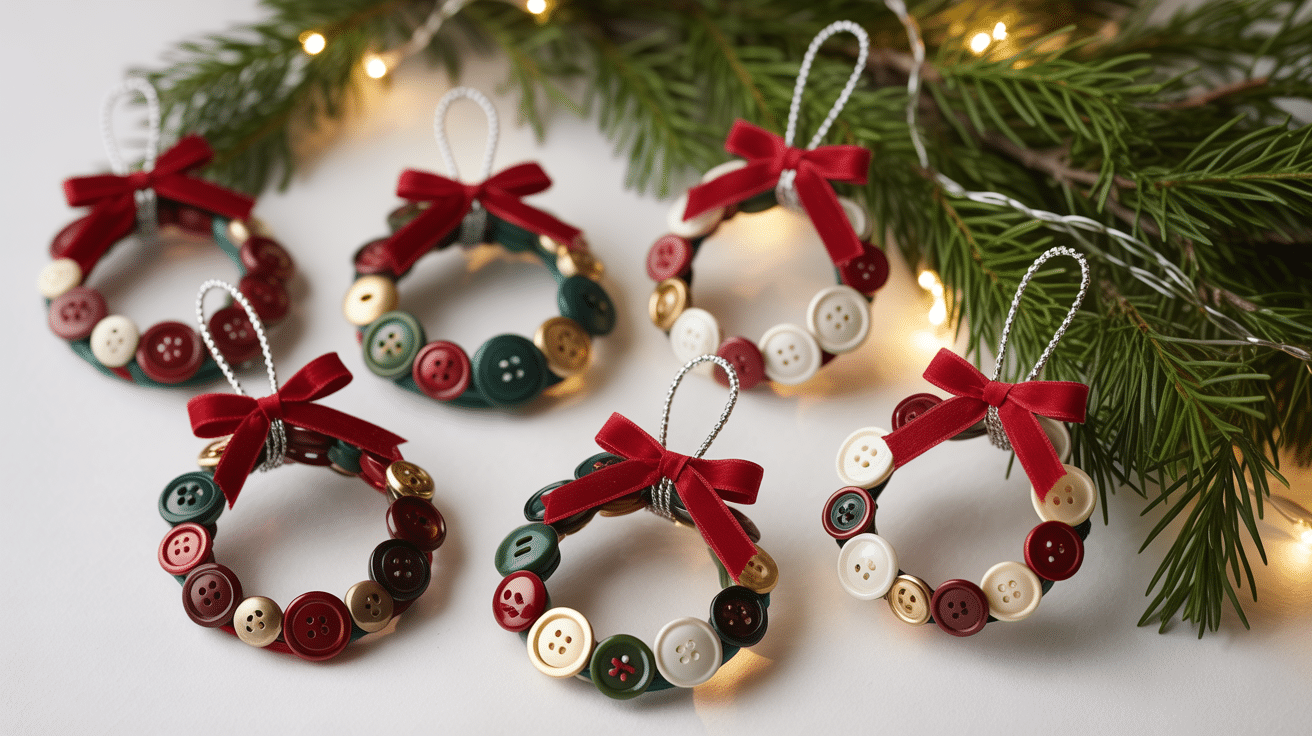
These mini wreaths are perfect for using up extra buttons. Each one turns out unique and colorful.
Materials Required: Wire or pipe cleaners, assorted green buttons, red ribbon, and pliers.
Step-by-step process:
- Step 1: Form the wire into a circle.
- Step 2: Thread buttons onto the wire.
- Step 3: Fill the entire circle with buttons.
- Step 4: Twist ends together to close.
- Step 5: Tie a red ribbon bow at the bottom.
- Step 6: Add a loop for hanging.
19. Paper Bag Stars
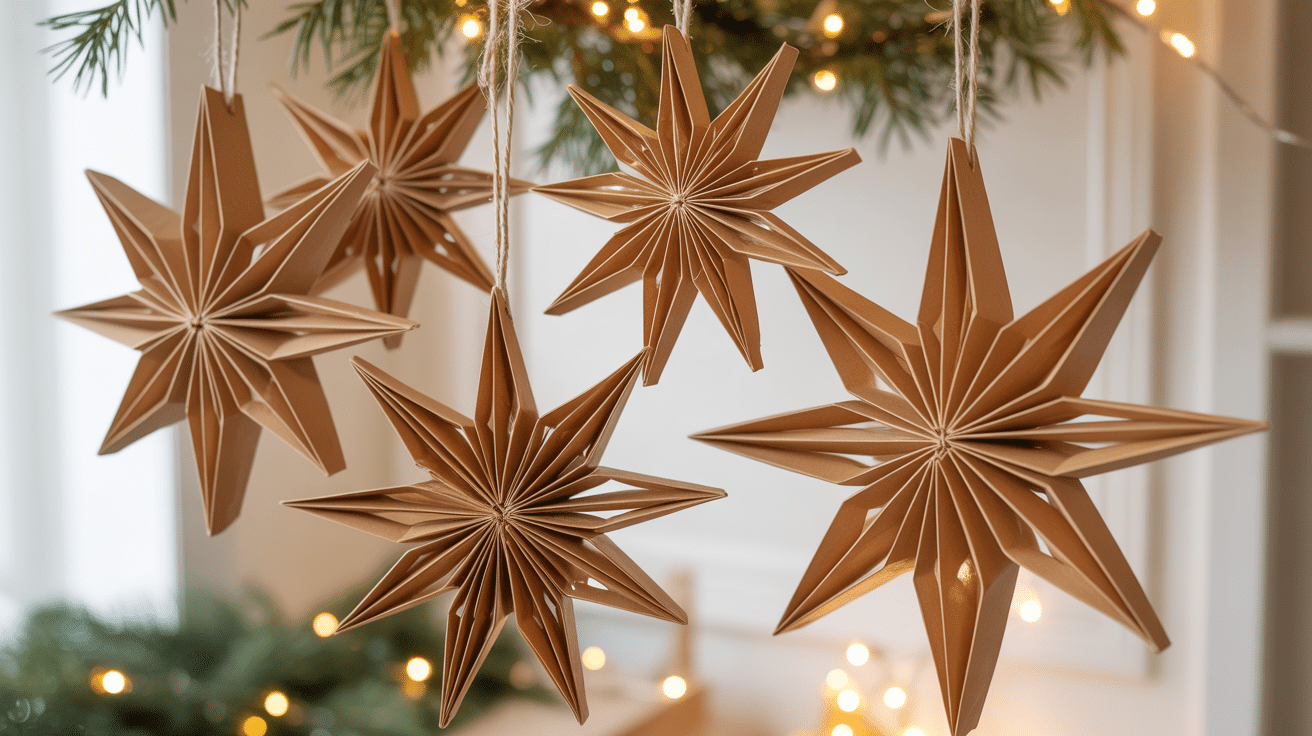
Brown paper bags transform into beautiful stars. They look expensive, but cost almost nothing to make.
Materials Required: Brown paper bags, glue stick, scissors, and string or wire.
Step-by-step process:
- Step 1: Stack and glue six paper bags together.
- Step 2: Draw a half-star shape on top.
- Step 3: Cut along the line through all layers.
- Step 4: Fan out and glue ends together.
- Step 5: Pull the center out gently.
- Step 6: Attach a string for hanging.
- Step 7: Flatten slightly for dimension.
20. Candy Cane Sleigh
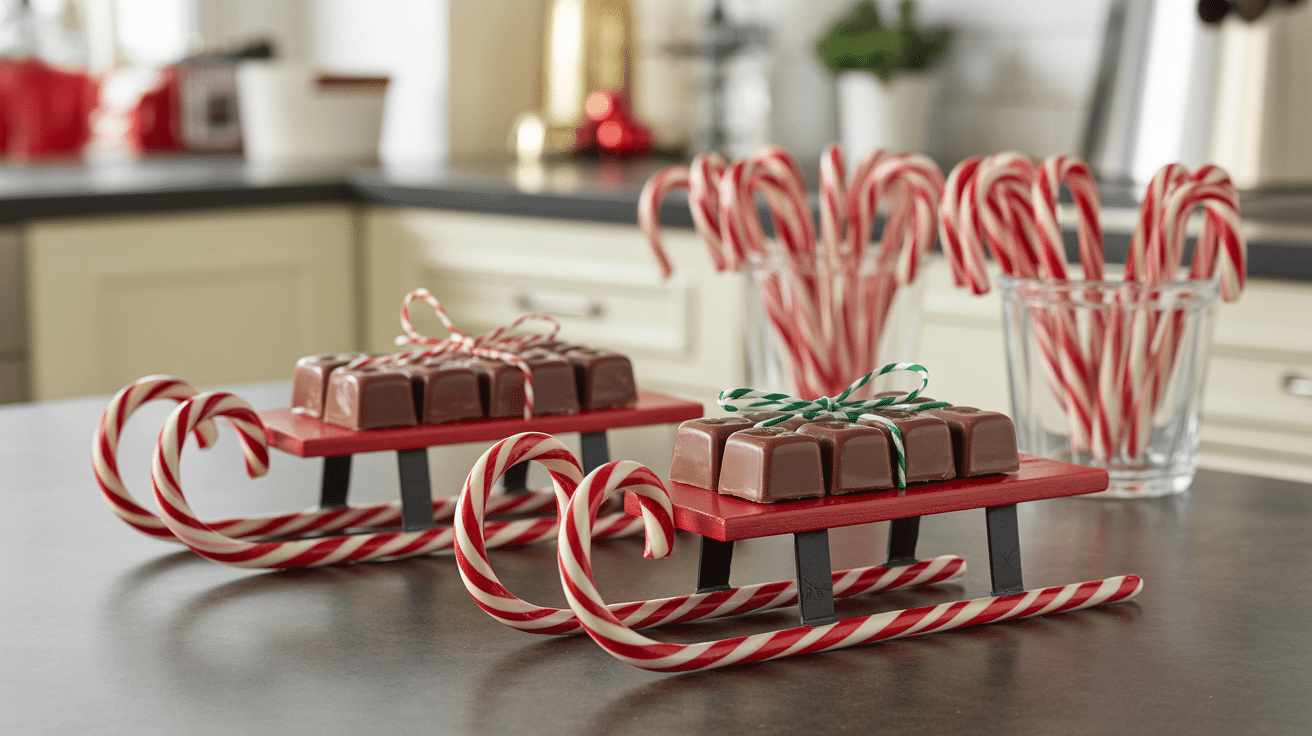
This sweet sleigh holds treats and looks adorable. Kids love receiving these as gifts.
Materials Required: Candy canes, hot glue, chocolate bars, and ribbon.
Step-by-step process:
- Step 1: Glue two candy canes as runners.
- Step 2: Stack chocolate bars between them.
- Step 3: Glue bars together.
- Step 4: Tie the ribbon around as decoration.
21. Wooden Bead Garland

This modern garland adds a stylish touch. It works well with any decor style.
Materials Required: Wooden beads, twine, scissors, and paint (optional).
Step-by-step process:
- Step 1: Paint some beads if desired.
- Step 2: Let the paint dry completely.
- Step 3: String beads onto twine.
- Step 4: Vary sizes for interest.
- Step 5: Tie knots between sections.
- Step 6: Hang on the tree or the mantel.
22. Ice Skate Ornaments
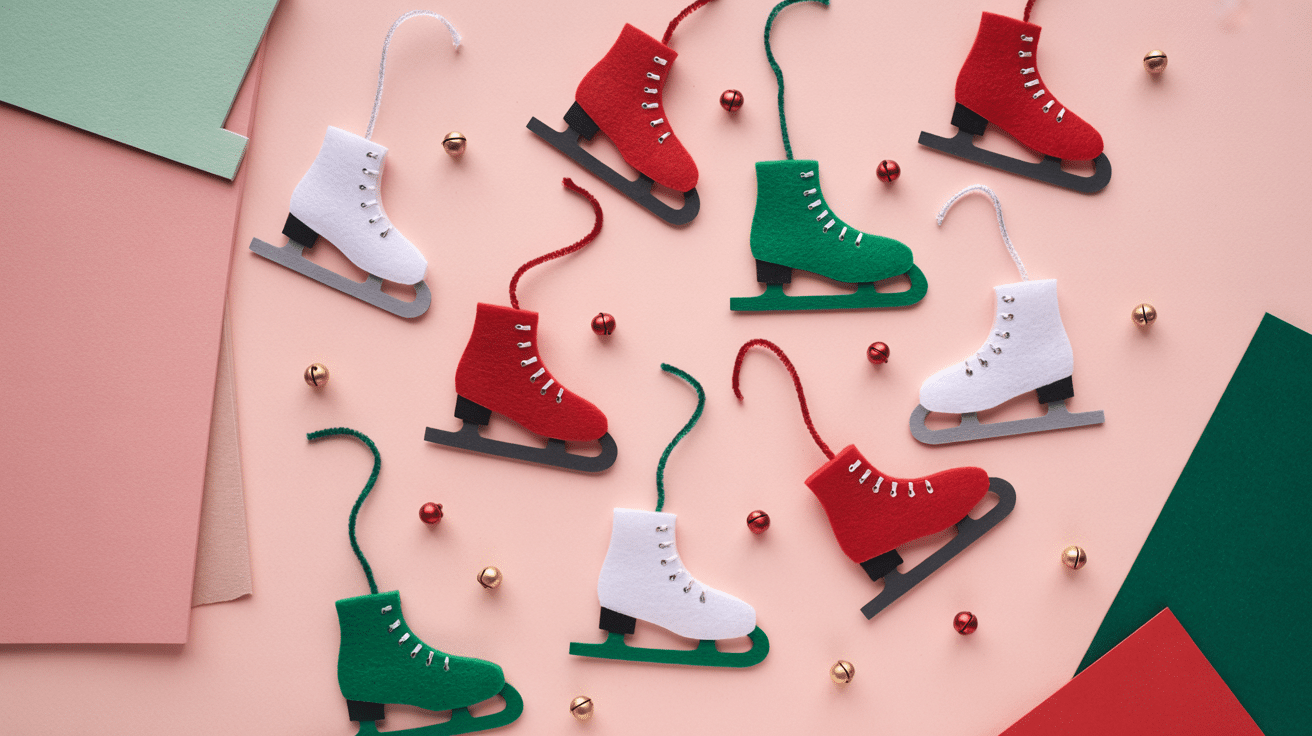
Miniature ice skates capture the spirit of winter. These look charming hanging from branches.
Materials Required: Craft foam or felt, pipe cleaners, ribbon, scissors, glue, and small jingle bells.
Step-by-step process:
- Step 1: Cut skate boot shape from foam.
- Step 2: Fold the pipe cleaner for the blade.
- Step 3: Glue the blade to the boot bottom.
- Step 4: Thread ribbon through for laces.
- Step 5: Add a jingle bell to the toe.
- Step 6: Attach a hanging loop on the back.
- Step 7: Make pairs for extra cuteness.
23. Tin Can Lanterns
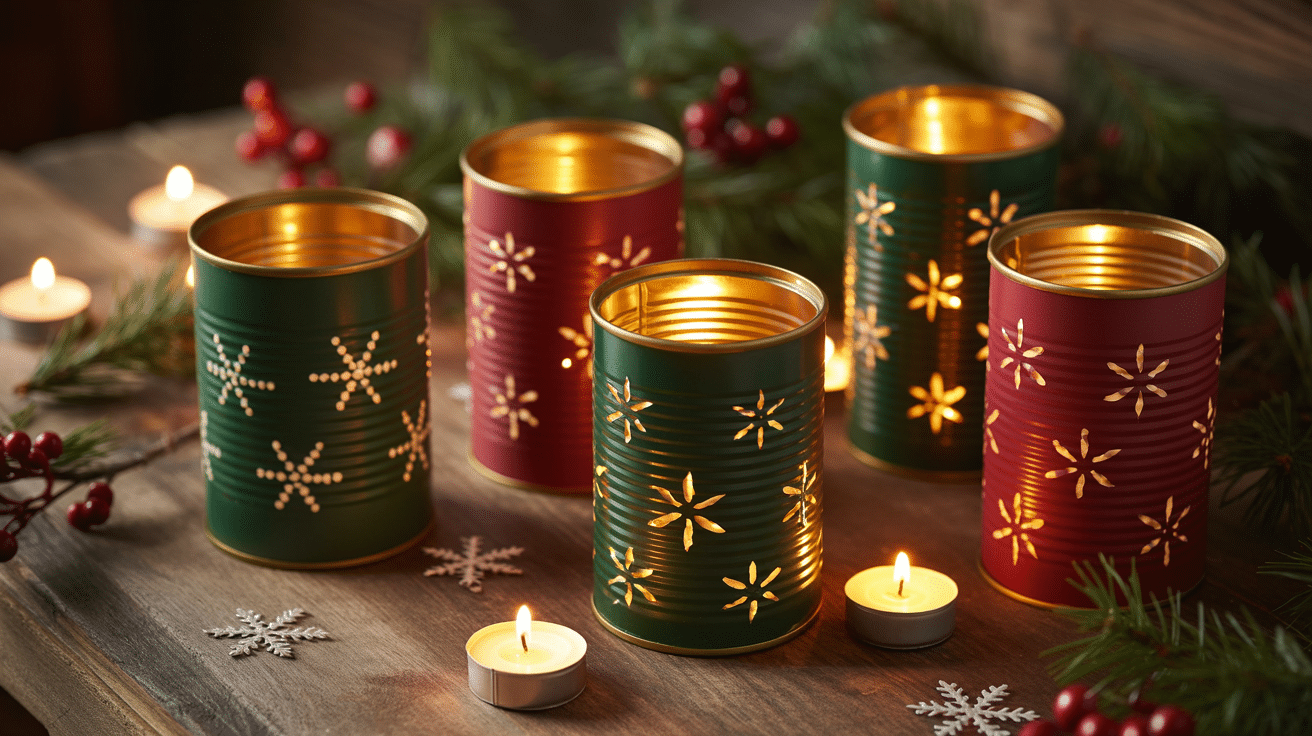
Old cans become beautiful lanterns with holes punched in patterns. They create lovely light displays.
Materials Required: Clean tin cans, hammer, nail, tea light candles, paint, and wire.
Step-by-step process:
- Step 1: Fill the can with water and freeze.
- Step 2: Draw a pattern on the outside.
- Step 3: Hammer nail through pattern points.
- Step 4: Let the ice melt out.
- Step 5: Paint can your chosen color.
- Step 6: Attach the wire handle.
- Step 7: Place the candle inside.
24. Ribbon Candy Ornaments
These ornaments mimic old-fashioned ribbon candy. They add a sweet, nostalgic touch to your tree.
Materials Required: Wired ribbon, hot glue, styrofoam balls, and pins.
Step-by-step process:
- Step 1: Cut ribbon into strips.
- Step 2: Fold ribbon into accordion pleats.
- Step 3: Pin pleats to the styrofoam ball.
- Step 4: Cover the entire ball with ribbon.
- Step 5: Add hanging ribbon on top.
25. Twig Stars
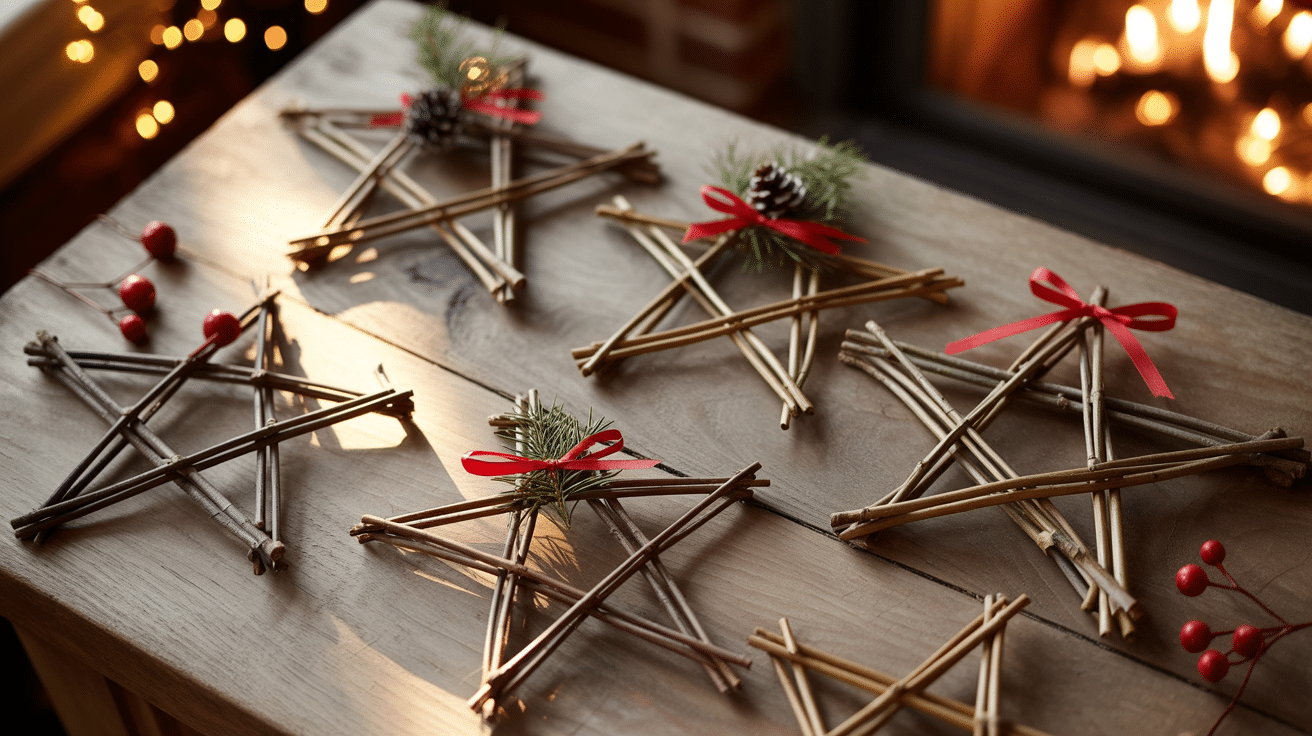
Natural twigs form rustic stars perfect for a woodland theme. Gather twigs from my yard for free.
Materials Required: Five twigs of similar size, twine or wire, scissors, and paint (optional).
Step-by-step process:
- Step 1: Arrange twigs in a star shape.
- Step 2: Bind intersections with twine.
- Step 3: Wrap the twine around several times.
- Step 4: Tie off securely at each point.
- Step 5: Paint white for a snowy look if desired.
- Step 6: Add hanging loop.
26. Coffee Filter Flowers
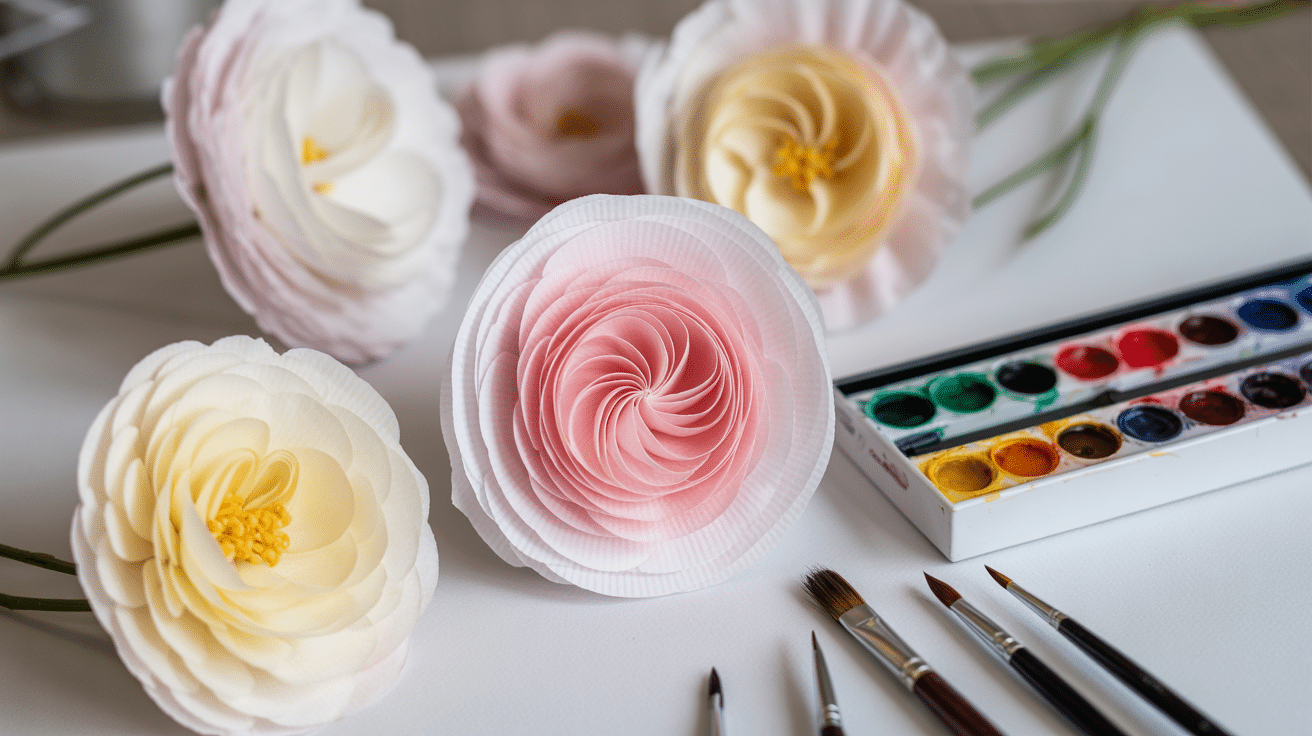
White coffee filters make delicate flowers for your tree. They look surprisingly real when appropriately shaped.
Materials Required: Coffee filters, watercolors or food coloring, pipe cleaners, scissors, and water.
Step-by-step process:
- Step 1: Color filters with watercolors.
- Step 2: Let dry completely.
- Step 3: Layer several filters together.
- Step 4: Pinch the center and twist.
- Step 5: Wrap a pipe cleaner around the base.
- Step 6: Separate layers and fluff.
- Step 7: Hang or attach to branches.
27. Sweater Mittens Garland

Old sweaters get new life as cute mitten decorations. This project is excellent for recycling worn clothing.
Materials Required: Old sweaters, scissors, needle and thread, twine, and buttons.
Step-by-step process:
- Step 1: Cut mitten shapes from the sweater.
- Step 2: Sew two pieces together.
- Step 3: Leave the top open.
- Step 4: Sew button decoration on front.
- Step 5: Attach mittens to twine.
- Step 6: Space evenly along the string.
28. Walnut Shell Boats
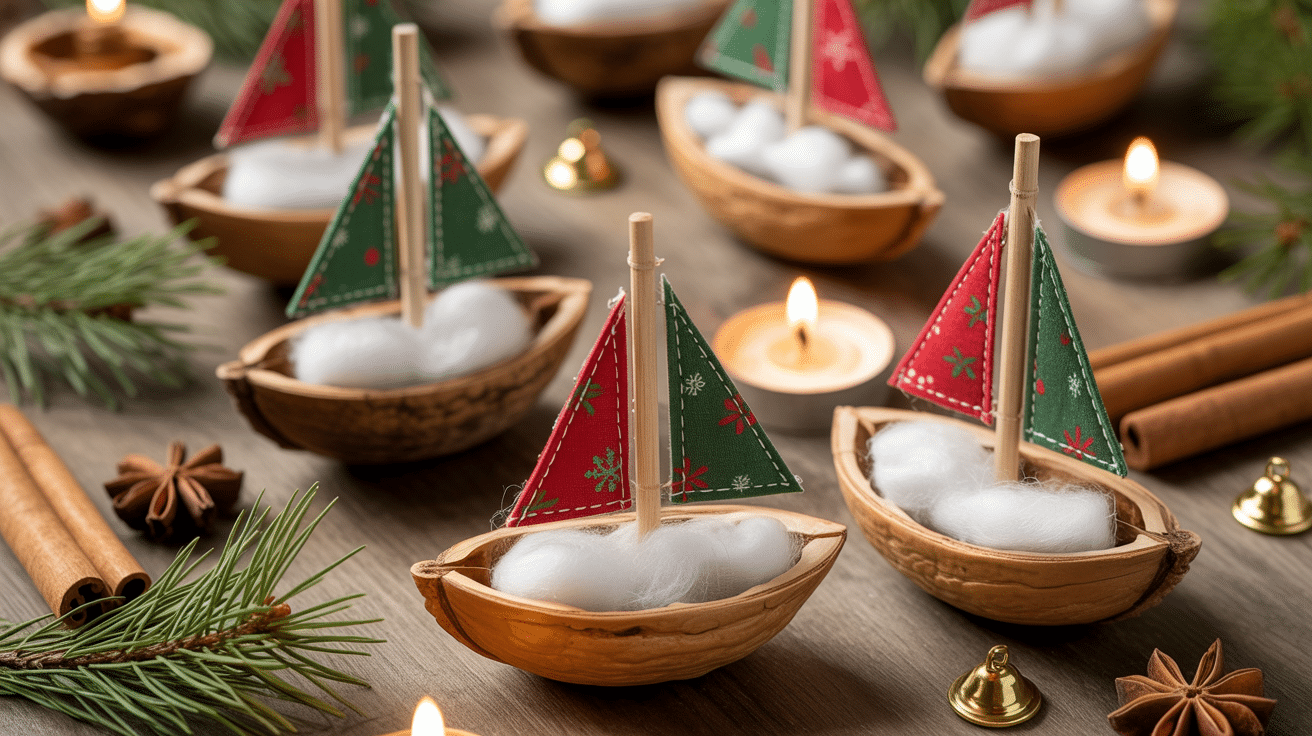
Tiny walnut shell boats are precious ornaments. Fill them with small treasures or leave them simple.
Materials Required: Walnut shells, small wooden picks, paper or fabric scraps, hot glue, and twine.
Step-by-step process:
- Step 1: Carefully crack walnuts in half.
- Step 2: Remove the nut meat inside.
- Step 3: Cut a small triangle for the sail.
- Step 4: Glue the sail to the wooden pick.
- Step 5: Glue the pick inside the shell.
- Step 6: Add twine for hanging.
29. Book Page Trees
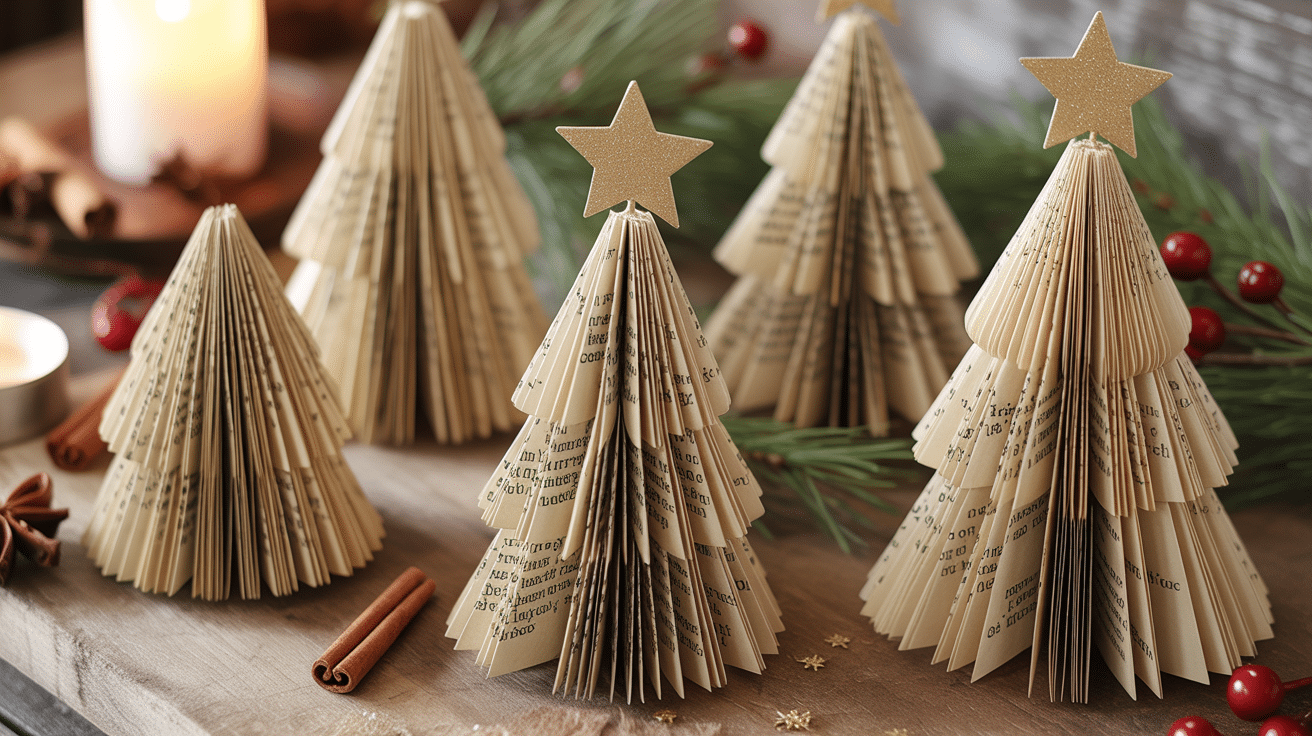
Old book pages create vintage-style trees. They’re perfect for readers and literature lovers.
Materials Required: Old book pages, cardstock cones, glue, scissors, and a small star for the top.
Step-by-step process:
- Step 1: Roll cardstock into a cone shape.
- Step 2: Glue the cone closed.
- Step 3: Cut book pages into circles.
- Step 4: Glue the circles overlapping on the cone.
- Step 5: Start at the bottom and work up.
- Step 6: Attach a star on top.
- Step 7: Display on shelf or table.
30. Clothespin Snowflakes
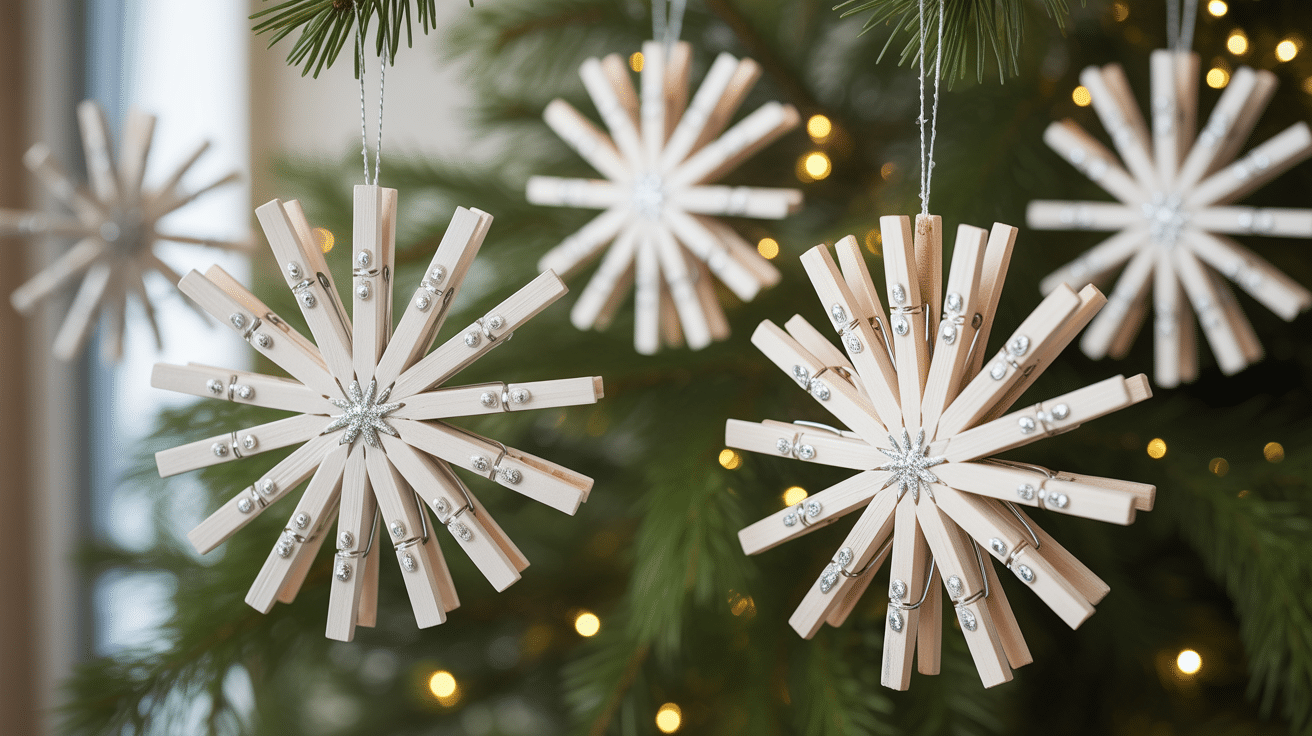
Clothespins arranged in patterns make unique snowflakes. Paint them white or leave natural wood showing.
Materials Required: Wooden clothespins, hot glue, white paint, glitter, and ribbon.
Step-by-step process:
- Step 1: Disassemble clothespins into pieces.
- Step 2: Arrange flat pieces in a snowflake design.
- Step 3: Glue all pieces together at the center.
- Step 4: Paint white if desired.
- Step 5: Add glitter while wet.
- Step 6: Attach ribbon for hanging.
31. Mason Jar Lid Ornaments
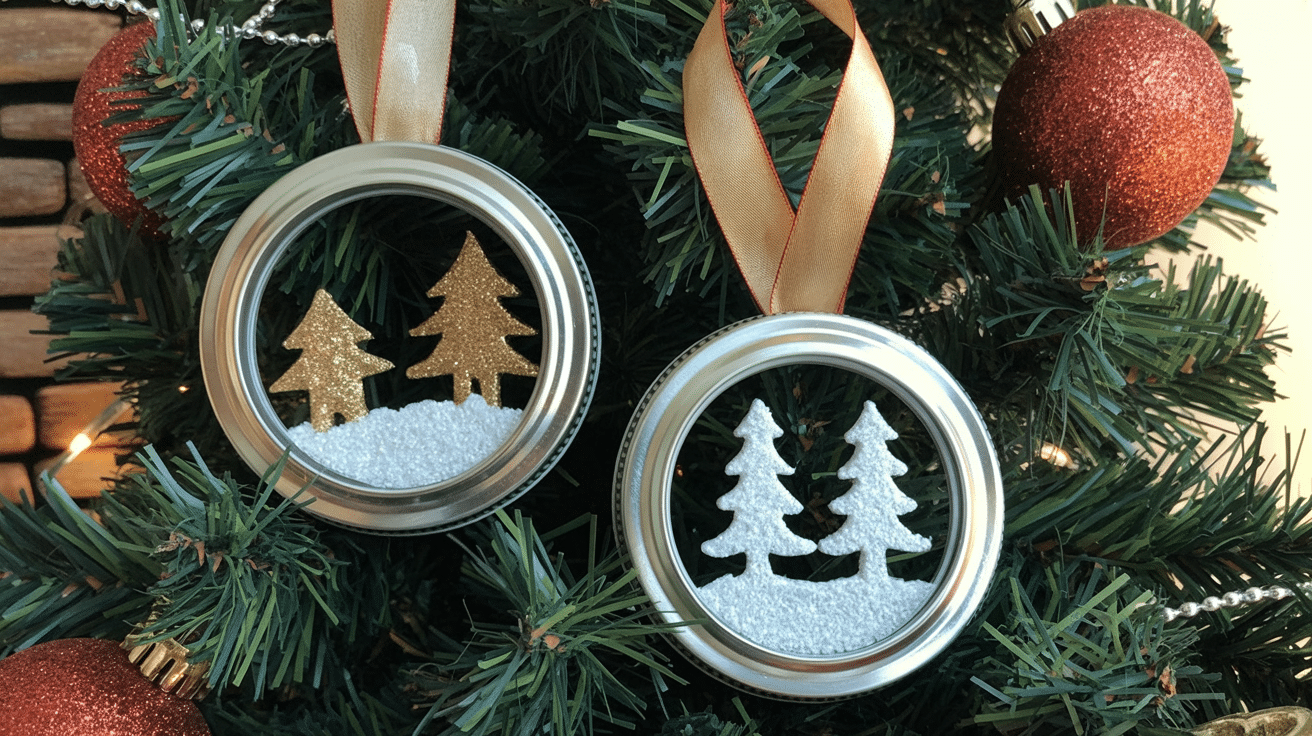
Jar lids frame small scenes perfectly. These ornaments are easy to personalize with photos or tiny objects.
Materials Required: Mason jar lids and small photos or images, ribbon, glue, and cardstock.
Step-by-step process:
- Step 1: Cut cardstock to fit the lid.
- Step 2: Glue the image to the cardstock.
- Step 3: Place in the jar lid.
- Step 4: Screw the ring over the top.
- Step 5: Thread ribbon through ring holes.
- Step 6: Tie ribbon in a bow.
- Step 7: Hang on the tree or give as gifts.
Display Tips to Make Your Tree Look Well Arranged
- Start with the lights first before adding any ornaments to your tree.
- Place larger ornaments near the bottom and smaller ones toward the top for balance.
- Hang ornaments at different depths on branches to create visual dimension.
- Use a mix of matte, shiny, and textured ornaments for variety.
- Fill gaps with ribbon, garland, or picks to cover bare spots.
- Cluster ornaments in groups of three for a professional look.
- Place special ornaments at eye level where they’ll get noticed most.
- Use floral wire to secure heavy ornaments so they don’t slip.
- Add a tree topper last to complete the overall design
Final Thoughts
Making your own Christmas decorations doesn’t require fancy supplies or expert skills.
You’ve got ideas now that work with simple materials you probably have at home. Each ornament you create carries a story. Your kids will remember the afternoon you spent stringing popcorn.
Your guests will notice the care you put into those cinnamon stars.
Your homemade decorations will make your home feel more generous than any store-bought items ever could.
So grab those supplies, put on some Christmas music, and start creating.