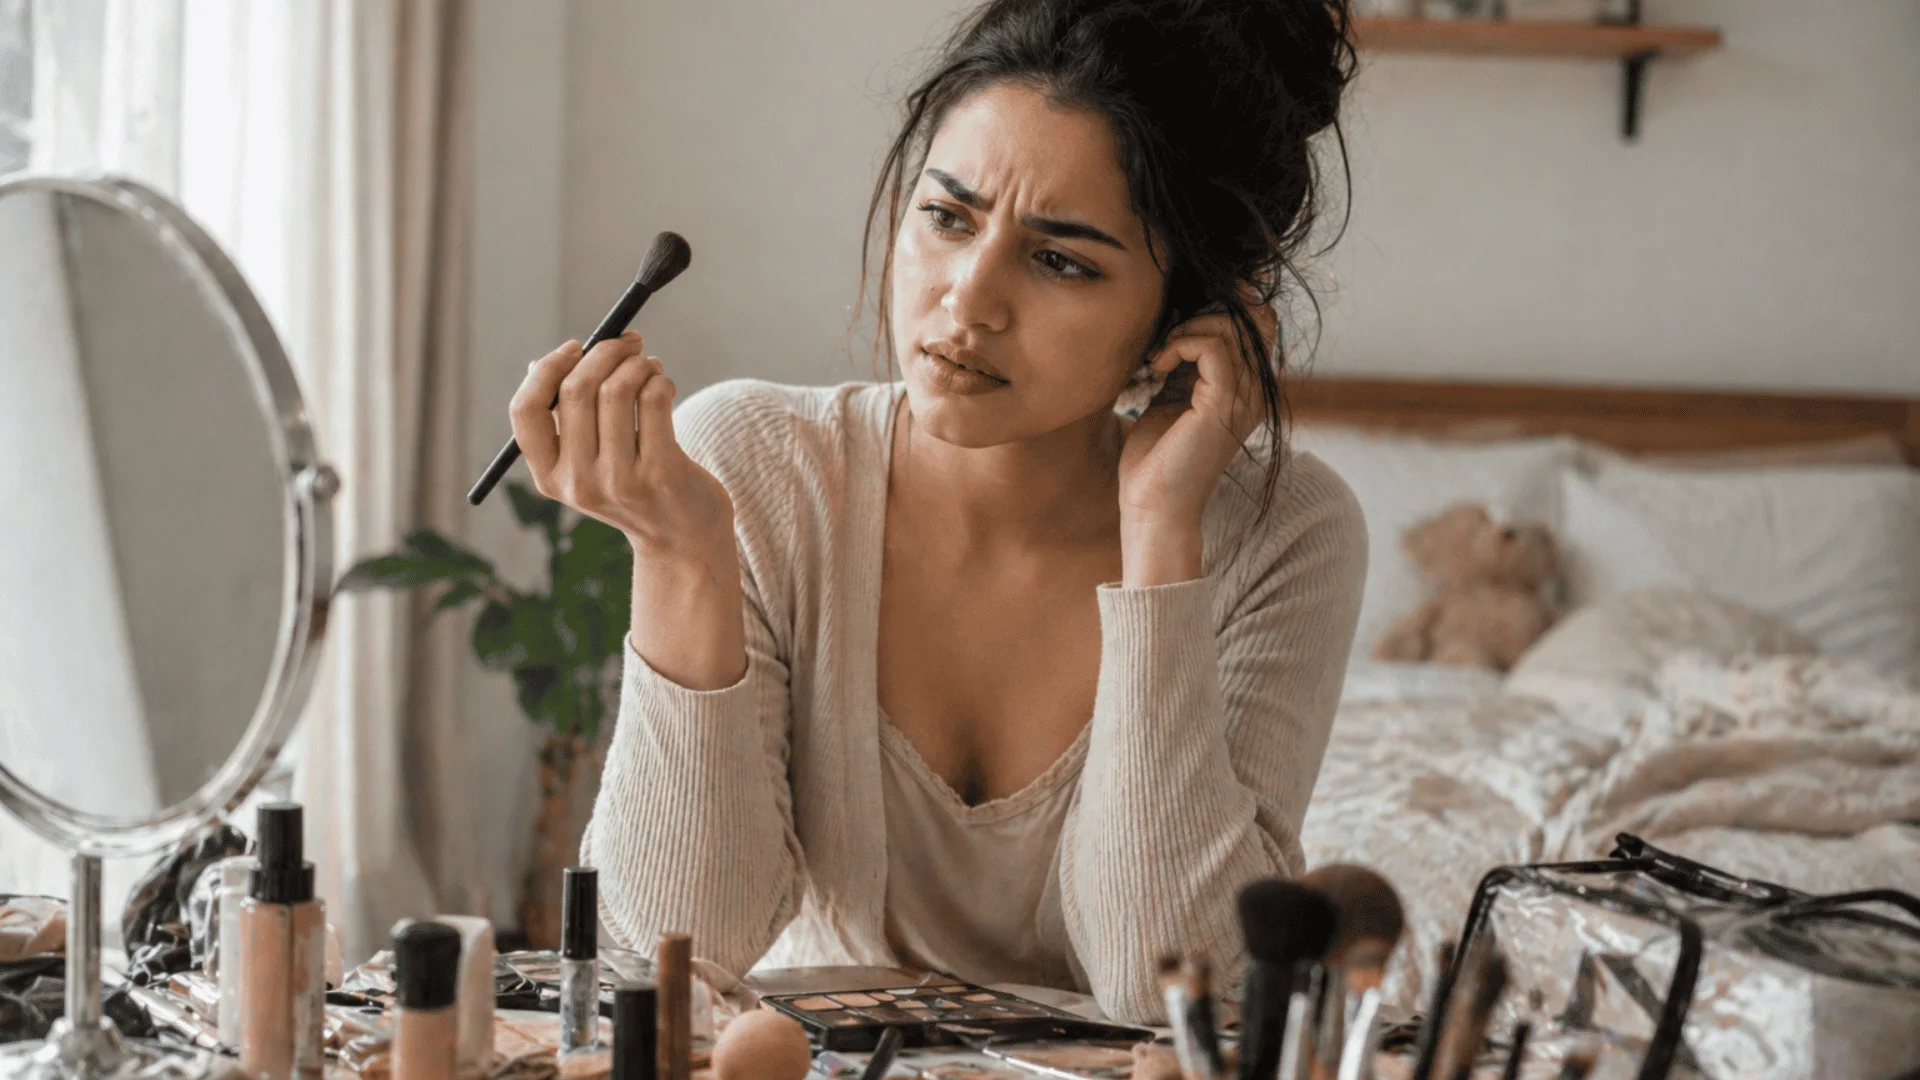
I still remember the first time I sat in front of my mirror with a full makeup bag and absolutely no idea what to do with any of it.
Foundation on my fingers, mascara wand in hand, and three different brushes I couldn’t name.
It felt like everyone else had been handed a secret manual, and mine got lost in the post. If that sounds like you, you’re in good company.
Learning makeup doesn’t have to mean watching a hundred tutorials or spending a fortune on products.
Sometimes all you need is a gentle starting point, a few honest tips, and the confidence to just try things at home with no pressure.
That’s exactly what this post is. A no-fuss guide to simple makeup looks that actually work for beginners, covering everything from a clean everyday face to a bit of color.
Basic Makeup Essentials You Actually Need
Before you try any look, it helps to know what’s worth having in your kit.
Not everything on the shelf. Just the pieces that do the most work with the least fuss.
Here is an honest beginner’s kit:
- Tinted moisturizer or BB cream: Lighter than foundation and much kinder to beginners
- Concealer: One shade lighter than your skin tone, used under the eyes and on blemishes
- Cream blush: Blends easily and gives a soft, natural finish
- Brow pencil or brow gel: A groomed brow lifts the whole face
- Mascara: One coat opens up your eyes more than you’d expect
- A neutral eyeshadow palette: Three to four shades in warm or cool neutrals will carry you through most looks
- A lip color you love: A tinted balm, a nude, or something bold. Whatever feels like you
- One fluffy face brush and one small eyeshadow brush: that’s genuinely all you need at this stage
You don’t need every single one of these right away. Pick three or four and build from there. Once you know what you have, the next step is getting your skin ready to work with it.
Quick Prep Routine Before Any Makeup Look
Makeup always sits better on prepped skin.
Clean, smooth skin makes everything look neater and lasts longer. This takes under five minutes, and the difference it makes is worth every second.
Step 1: Cleanse or splash your face. Start with a clean face. Even rinsing with water removes overnight oils and helps everything apply more evenly.
Step 2: Moisturize. Apply a lightweight moisturizer and give it two to three minutes to absorb. Applying makeup too soon after can cause it to pill or move around. A little patience goes a long way.
Step 3: Apply SPF if needed. If your moisturizer doesn’t contain SPF, a light sunscreen on top is a great habit to build early. Some BB creams already include it, which simplifies the whole process.
Step 4: Let everything settle. While your skin absorbs, brush your teeth or choose your outfit.
Coming back to your face after a few minutes means your base will go on far more smoothly.
Four steps and your skin is ready. Now for the looks.
Picking the Right Makeup Look
I used to overthink this a lot, but it really comes down to time and how I want to feel.
On busy days, I go for quick, simple makeup looks that make me look fresh and awake. When I have more time, I like adding a bit of blush or liner for extra detail.
And on days I want to feel confident, a bold lip always works.
I just ask myself what I want to highlight, and it becomes much easier.
Simple Makeup Looks with Step-by-Step Tutorials
One day, I watched a makeup video by YouTube creator Elena Rachitskaya and tried to recreate it at home, but those early mistakes pushed me to find out what actually works for me.
And these four looks are arranged from the most minimal to the most statement-making.
Start very simply and slowly add a bit more detail, so you can learn at your own pace
1. Start Here: The Everyday No-Makeup Makeup Look

This is the one I always recommend first. The no-makeup makeup look sounds like a contradiction, but what it really means is your face, just a little more polished.
The goal isn’t to cover everything up. It’s to even out your skin tone, add a little brightness, and make you look like you slept well.
Even when you didn’t.
What You’ll Need:
- A light coverage BB cream or tinted moisturizer
- A concealer one shade lighter than your skin tone
- A clear or tinted lip balm
- A fluffy brush or beauty blender
How to do it:
Start by applying a small amount of BB cream all over your face using your fingers or a damp beauty blender.
Blend it in downward strokes so it sits with your skin rather than against it. Then dab a tiny bit of concealer under your eyes and on any spots you want to soften.
Blend the edges so there are no lines. Finish with a swipe of lip balm, and that’s genuinely it.
This is the look I wear on early mornings when Scout and I head out for a walk, and I still want to feel put together without trying too hard. It takes about four minutes once you know what you’re doing.
2. The 5-Minute Fresh Face: Great for Everyday Wear

Once you’re comfortable with the basics, this is the next step.
It adds a little more definition without crossing into full glam territory.
What You’ll Need:
- BB cream or light foundation
- Concealer
- A cream blush in a peachy or rosy shade
- Mascara
- A brow pencil or brow gel
How to do it:
Apply your base the same way as above.
Then smile and dab a small amount of cream blush onto the apples of your cheeks, blending it upward toward your temples.
Cream blush is much more forgiving than powder, which is why I always point beginners toward it first.
Next, fill in your brows lightly. You don’t need them to be perfectly sculpted. Just brush them into shape and add a few light pencil strokes where they look sparse. Then finish with two coats of mascara on your upper lashes.
The difference this makes is genuinely lovely. It’s the kind of look where people say “you look great today” without being able to pinpoint exactly why.
3. A Simple Everyday Eye Look (No Blending Skills Required)
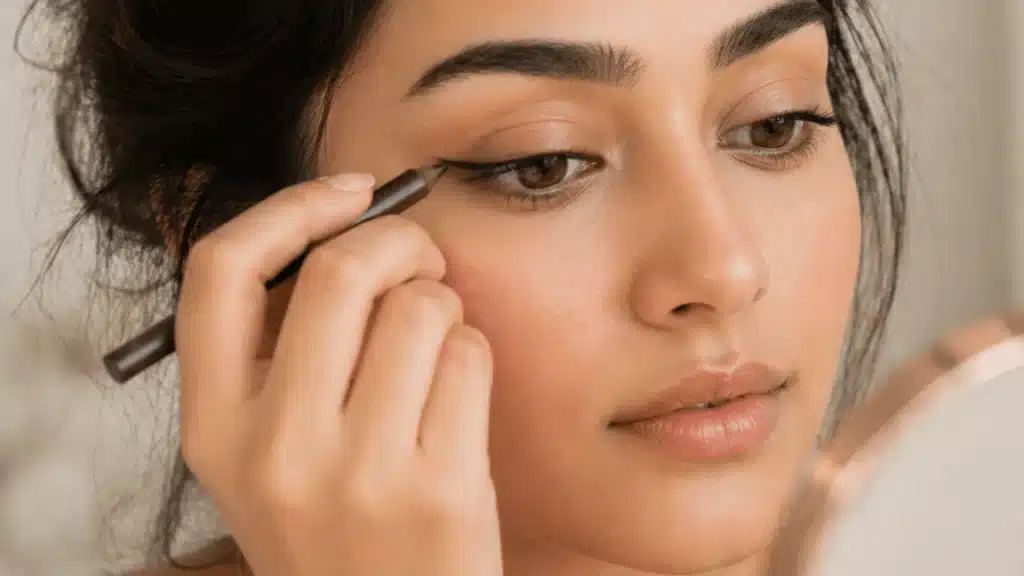
Eyes can feel scary. I completely get it.
But this look uses a single eyeshadow shade and liner to create something that looks put together without needing any real technique.
What You’ll Need:
- A single matte eyeshadow in a warm brown or soft taupe
- A brown or black eyeliner pencil (not liquid, not yet)
- Mascara
How to do it:
Using your finger or a flat eyeshadow brush, press the eyeshadow onto your lid from your lash line up to your crease. Don’t worry about making it perfect.
Unblended edges can actually look really pretty in a natural, lived-in way.
Then take your eyeliner pencil and draw a soft line along your upper lash line, as close to the lashes as you can get. It doesn’t need to be sharp.
A slightly smudged line is actually more flattering for most eye shapes. Finish with mascara.
That’s your eye looking done. Three products, five minutes, and you’ll be surprised how much it changes the whole face.
4. The Bold Lip Look (Simpler Than it Sounds)
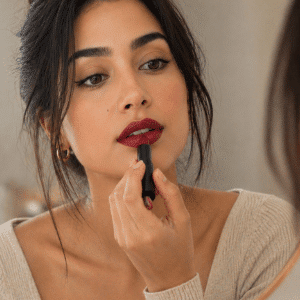
A bold lip is one of those simple makeup looks that does all the heavy lifting on its own.
You don’t need to do anything else to your face.
The lip is the whole point.
What you’ll need:
- A lipstick in your chosen color (red, berry, terracotta, dusty rose)
- A lip liner in a matching or slightly deeper shade
- A tissue
How to do it
Line your lips first. Start from the center of your upper lip and work outward. This gives your lipstick something to grip and stops it from feathering.
Then fill in your lips with the lipstick straight from the bullet.
Press your lips together and then press them onto a tissue once to remove any excess. This makes the color last so much longer without looking heavy.
Keep the rest of your face minimal: a little concealer, clear brows, and maybe a swipe of mascara. Let the lip do the talking.
5. Bronzed Glow Look: Soft Sun-Kissed Glow
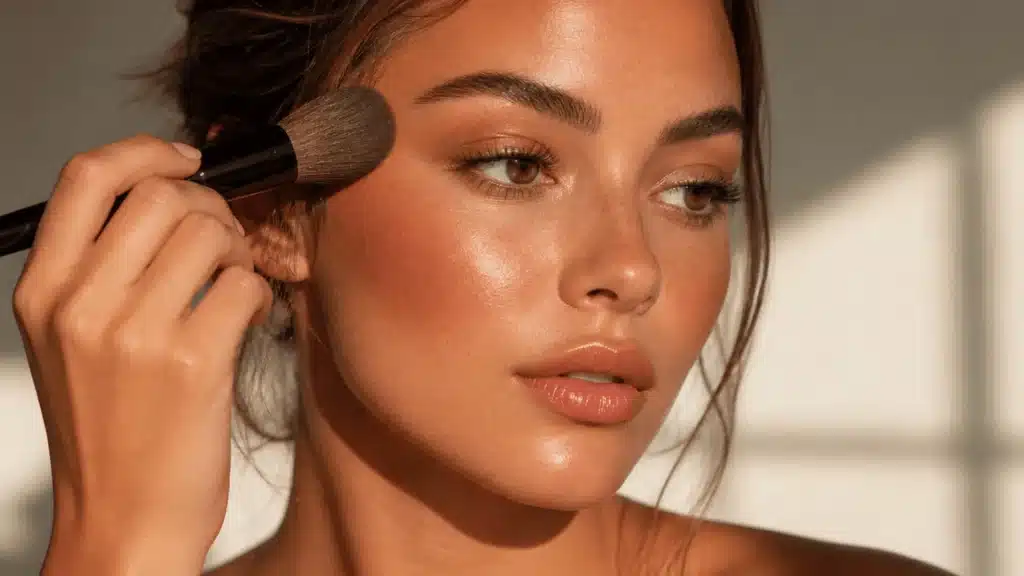
A matte bronzer swept across the forehead, cheeks, nose, and chin, followed by a peachy blush. Adds warmth and a little dimension to the face.
What You Will Need:
- Light foundation or BB cream
- Matte bronzer one to two shades deeper than your skin tone
- Cream blush in a peachy or warm coral shade
- Fluffy face brush
- Mascara
- Nude or tinted lip balm
How to do it:
Apply your base lightly, then load a small amount of bronzer onto your brush and tap off any excess.
Sweep it across your forehead, cheekbones, nose bridge, and chin in light circular strokes.
These are the areas where the sun naturally hits first. Check the result and blend out anything that looks too strong before moving on.
Smile and apply cream blush to the apples of your cheeks, blending upward toward the temples.
Finish with mascara and a nudey lip balm so the skin stays the focus.
6. Monochromatic Look: One Color, Whole Face
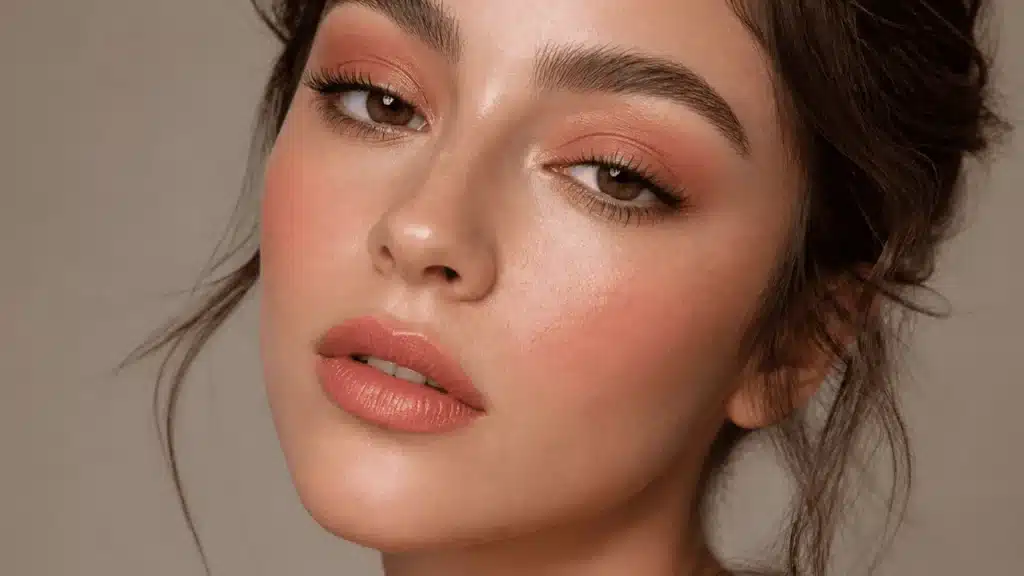
The same color family is used on the eyes, cheeks, and lips. It sounds like it requires planning, but it really does not.
Pick one shade you like and repeat it across all three areas. The look pulls itself together without any extra effort on your part.
What You Will Need:
- Foundation or BB cream
- Concealer
- Cream or powder eyeshadow in your chosen shade family
- Blush in the same or a similar shade
- Lip product in the same color family: tinted balm, sheer lipstick, or gloss
- Small eyeshadow brush or your finger
How to do it:
Apply your base and conceal where needed. Press your chosen eyeshadow shade onto your lids from the lash line to the crease using your finger or a flat brush.
Apply your blush in the same color family to the cheeks and blend upward.
Finish with your lip product of choice in the same shade range.
Step back and check the face as a whole.
If one feature looks stronger than the others, soften it slightly with your finger until everything reads at the same level.
Shade Combinations to Try:
- Warm: terracotta eyeshadow, coral blush, rust lip gloss
- Soft: mauve eyeshadow, pink blush, berry-tinted balm
- Neutral: taupe eyeshadow, nude blush, soft brown lip liner with clear gloss
7. Dewy Skin Look: Let Your Skin do the Talkin’

This look is about skin that looks healthy and lit from within. Hydration is the base.
A liquid highlighter mixed into your foundation does the rest. No heavy coverage, no powder, just a natural glow.
What You Will Need:
- Moisturiser applied several minutes before you begin
- Sheer or light coverage foundation or BB cream
- Liquid highlighter
- Concealer
- Damp beauty blender
- Clear brow gel
- Mascara
- Clear lip gloss
How to do it:
Moisturize and let your skin absorb for a few minutes before you start.
Apply a sheer or light coverage base, then press a small amount of liquid highlighter onto the high points of your face: cheekbones, brow bone, nose bridge, and cupid’s bow.
Alternatively, mix a drop or two directly into your foundation before applying for an all-over glow.
Blend with a damp beauty blender using a pressing motion rather than dragging.
Conceal where needed, groom your brows with clear gel, add one coat of mascara, and finish with a clear gloss on the lips.
8. A Sunset Eye Look: Two Shades, Nothing Else
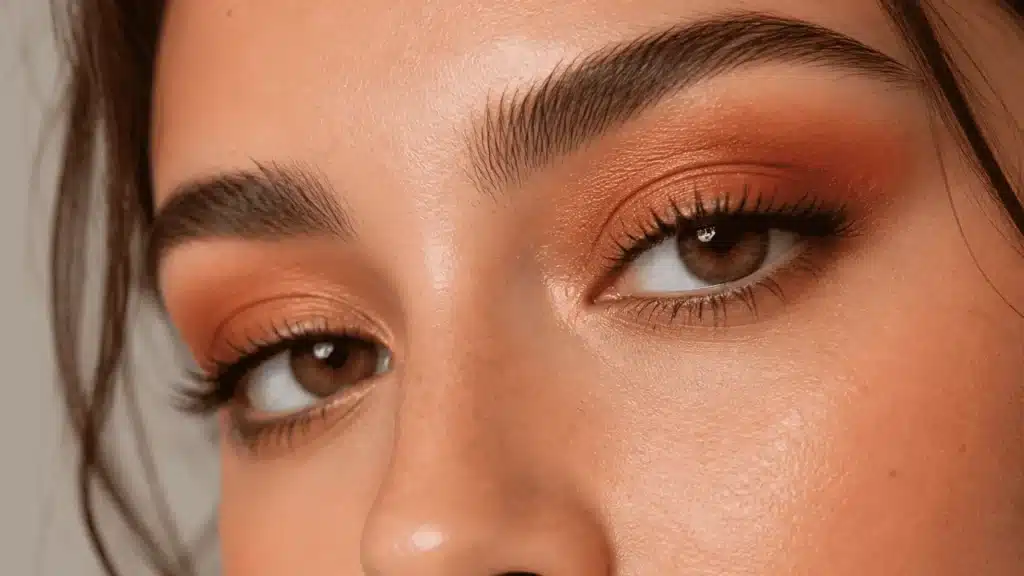
Two eyeshadow shades in warm amber and rust. Press one across the lid, the other into the outer corner. Done in under five minutes.
What You Will Need:
- Foundation or BB cream
- Concealer
- Warm amber or burnt orange eyeshadow
- Deeper rust, copper, or brown eyeshadow
- Brow pencil or brow gel
- Mascara
- Nude lip balm or nude lipstick
How to do it:
Apply your base, conceal under the eyes, and groom your brows first.
Then press the amber or burnt orange shade onto your lid from the lash line up to the crease using your finger.
Press the deeper rust or brown shade into the outer corner only and blend slightly inward with small circular motions.
The two shades will soften naturally where they meet.
Finish with two coats of mascara and keep the rest of the face minimal. A light base and a nude lip let the eyes do all the work.
One thing to avoid: Pressing the darker shade across the full lid. Keep it in the outer corner only. The contrast between the two shades is what creates the depth.
Celebrity-Inspired Simple Makeup Looks Worth Checking Out
Some of the most wearable everyday looks come straight from celebrity routines. Most of them are easier to recreate than you would think. Let’s have a look at it.
Kylie Jenner’s New Classic Beauty Routine
This video shows soft, natural makeup through Kylie’s updated everyday routine, focused on achieving a fresh look with fewer products.
She starts with simple skin prep, mixing moisturizer with foundation for a lighter base that blends seamlessly into the skin.
Instead of heavy contouring, she uses a small amount of bronzer for soft definition and adds a natural flush with cream blush.
Her eye makeup stays minimal, using neutral tones and a subtle liner to enhance shape without looking overdone.
Brows are kept soft and natural, while a touch of highlighter adds glow.
She finishes with mascara, focusing on lifting the outer lashes for a more defined eye shape.
Dua Lipa’s Everyday Beauty Routine
If you like a more relaxed, skin-first approach, Dua Lipa keeps her routine simple and focused on natural-looking skin.
She starts with skincare and then builds a light base using minimal product, letting her real skin show through instead of covering everything up.
What makes her approach stand out is how effortless it feels.
She does not follow strict steps, but instead mixes skincare with makeup, adds soft definition with bronzer and blush, and keeps everything fresh and wearable.
It is a reminder that makeup can feel easy, personal, and true to you.
Kendall Jenner’s Guide to “Spring French Girl” Makeup
Kendall Jenner keeps her routine simple and focused on healthy, glowing skin. She starts with skincare, then applies a light foundation using her hands for a more natural finish.
Instead of heavy contour, she builds warmth with soft bronzer and adds a fresh touch of blush.
Eyes are kept minimal with neutral tones, while brows stay natural and lightly filled.
She finishes with a slightly smudged bold red lip, giving the whole look a relaxed, effortless feel that still looks polished and put together.
Selena Gomez’s Guide to the Perfect Cat Eye
Selena Gomez keeps her routine simple, focusing on healthy skin and soft, natural makeup.
She starts with skincare, using moisturizer and sunscreen to prep her skin before applying a light foundation and blending concealer for an even finish.
She adds blush high on the cheeks for a lifted look, a touch of bronzer for warmth, and keeps eyes soft with neutral shades and liner.
What makes her approach stand out is how flexible it feels.
She builds the look gradually from day to night, showing that makeup can stay simple while still looking polished.
Easy Tips That Helped Me Improve My Makeup Skills
Repeat the same look
Doing one look for a few days builds confidence and speed. Your hands start remembering steps without needing to think much.
Use natural light
Daylight shows blending and color clearly compared to artificial light. It helps you notice uneven areas and fix them early.
Keep brushes clean
Clean brushes give smoother results and better blending. They also prevent buildup that can affect how makeup sits on your skin.
Use your fingers
Fingers blend cream products easily and create a natural finish. The warmth helps the product melt into your skin better.
Prep your skin
Basic skincare helps makeup apply smoothly and last longer. Even a simple routine can improve how your makeup looks overall.
Stop chasing perfection
Makeup improves with practice, not perfection. Every attempt teaches you something new and helps you feel more comfortable over time.
Wrapping Up
Simple makeup looks exist for exactly this moment: the beginning. You don’t need a full collection or a steady hand.
You just need to pick one look from this post and try it.
Some days it will feel clunky. Most days it will surprise you. Either way, you’re learning.
Give it a go this week and drop a comment below to let me know how it went
People Also Ask
1. Can Makeup Cause Hyperpigmentation?
Yes, it can. Heavy or pore-clogging products may trigger inflammation over time, which gradually leads to dark spots on the skin.
2. What Makeup do I Need for a Simple Look?
A BB cream, concealer, cream blush, and mascara are all you need to pull together a fresh, simple everyday look.
3. How do I Make My Makeup Last Longer?
Moisturize before you start, dust a light powder over oily areas, and blot with a tissue mid-day rather than reapplying.