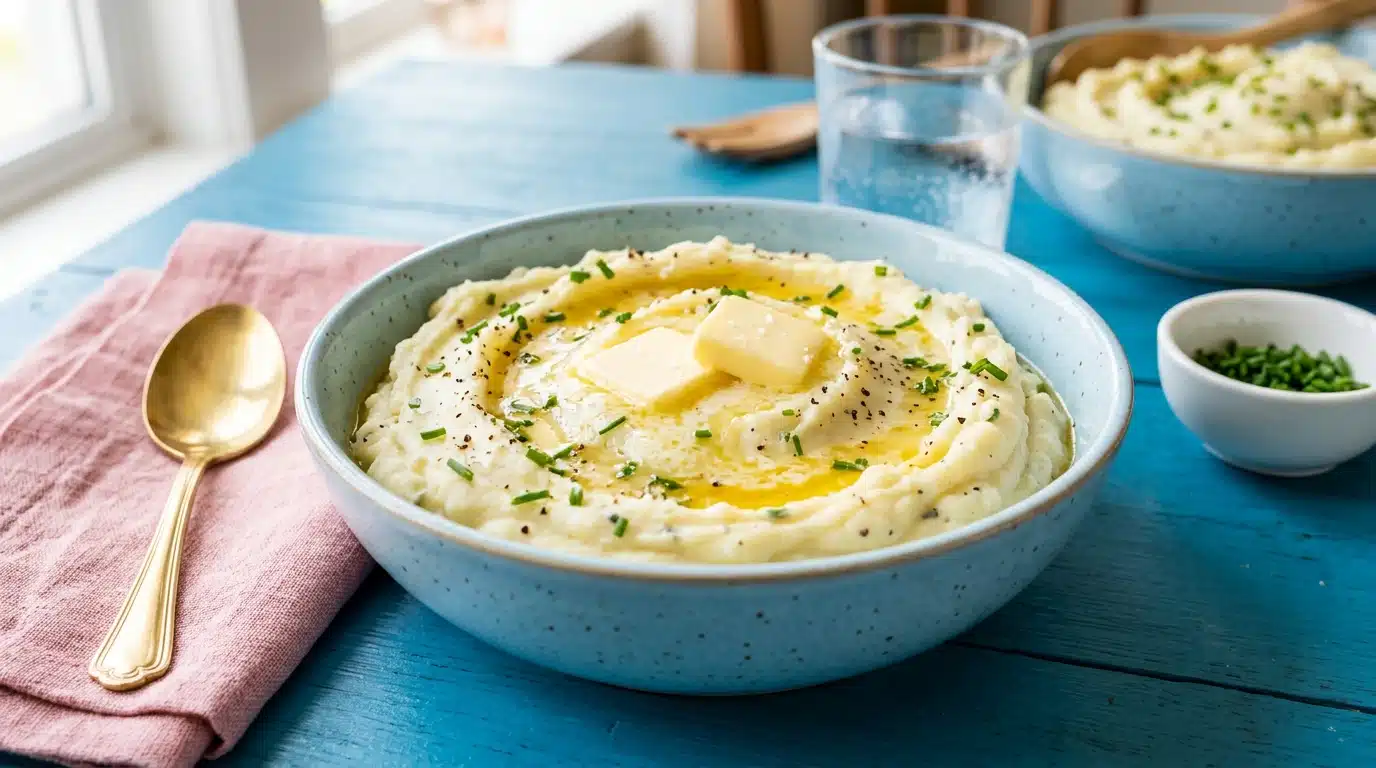
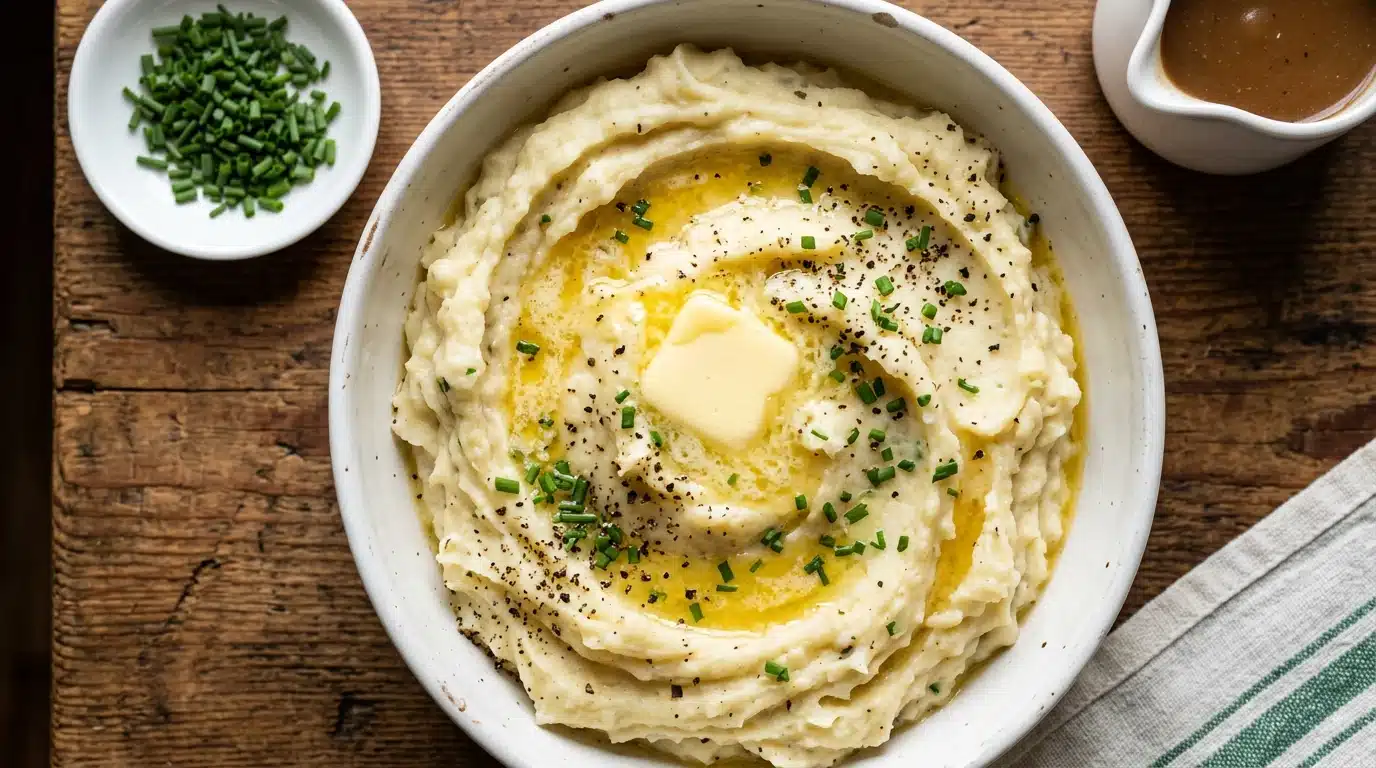
Mashed potatoes should be creamy, buttery, and rich enough to make you close your eyes on the first bite.
Not gluey. Not bland. Not the kind that sits heavy on the plate like wet cement.
Yukon Golds are built for this.
That natural buttery flavor and silky texture do half the work before you’ve even turned on the stove.
But technique matters too. The wrong steps turn even great potatoes into something forgettable.
These creamy Yukon Gold mashed potatoes have earned a permanent spot on my table, dinners, holiday spreads, and the kind of night when you just need something that feels like home. Here’s how I make them.
What Makes Yukon Gold Potatoes Ideal for Creamy Mashed Recipes
Yukon Golds have a natural buttery flavor that most potatoes don’t have.
They’re a medium-starch variety.
Which means they mash up smooth and velvety without getting gluey the way high-starch russets can.
Less starch also means they hold onto moisture better, so the creaminess comes naturally rather than needing to be coaxed out with excessive butter or cream.
The result is a mash that feels rich and indulgent without any extra effort.
Ingredients Breakdown with Purpose
Every ingredient here pulls its weight. Nothing unnecessary.
- Yukon Gold Potatoes: 2 lbs | Substitute: Russet potatoes
- Unsalted Butter: 4 tbsp | Substitute: Brown butter
- Heavy Cream: ½ cup, warmed | Substitute: Whole milk or crème fraîche
- Garlic: 3 cloves, roasted | Substitute: ¼ tsp garlic powder
- Salt: 1½ tsp, plus more for water
- White Pepper: ¼ tsp | Substitute: Black pepper or nutmeg
A Little Prep Before Cooking
Start by scrubbing the potatoes well under cold water. Peeling is personal.
Yukon Golds have thin, delicate skins, so leaving them on adds a little rustic texture.
For a smoother mash, peel them. Cut into even 1-inch chunks so everything cooks at the same rate.
A pot that fits the potatoes comfortably without crowding makes a real difference; too small and they cook unevenly, too large and they waterlog.
How to Make These Creamy Yukon Gold Mashed Potatoes
Simple steps, no special equipment. Just good technique and a little patience.
Step 1: Peel and Cut the Potatoes
Cut into even, roughly 1-inch chunks. Uniform sizing matters; it means everything cooks at the same rate.
Uneven pieces leave you with some overcooked and some underdone. Take the extra minute to get them consistent.
Step 2: Boil in Salted Water
Start in cold salted water, then bring to a boil.
This helps the potatoes cook evenly from the inside out. Boil until fork-tender, around 15–18 minutes.
The fork should slide in with no resistance.
Step 3: Drain and Steam Dry
Drain well, then return to the hot pot for 1–2 minutes.
Let the residual heat evaporate the excess moisture. Dry potatoes absorb butter and cream far better. This one small step makes a noticeable difference in the final texture.
Step 4: Mash While Hot
Mash immediately using a potato ricer or hand masher.
Work quickly; potatoes turn gluey fast once they cool. A ricer gives the smoothest, lump-free result.
A standard masher works fine too, just expect a slightly more rustic texture.
Step 5: Add Butter First
Add cold butter to the hot mash and stir through. Cold butter emulsifies slowly, coating every bit of potato. This builds that rich, creamy base before anything else goes in.
Don’t rush this step; let the butter fully melt and incorporate.
Step 6: Stream in Warm Cream
Add warm cream gradually, stirring as you go. Never dump it all in at once. Stop when the texture feels silky and holds its shape without being stiff.
Warm cream keeps the mash loose and smooth, rather than causing it to seize.
Step 7: Season and Taste
Add salt, white pepper, and any extras now. Taste as you season.
A final pinch of salt right at the end often pulls the whole flavor together. Don’t skip tasting, it’s the step most people rush through.
Balancing all the Flavors
- Salt the boiling water generously; it’s the foundation of flavor.
- Taste as you go, not just at the end.
- White pepper adds heat without the sharpness of black pepper.
- A small pinch of nutmeg quietly deepens the overall flavor.
- Finish with a cold pat of butter on top just before serving.
Cooking Method Explained
The method matters just as much as the ingredients.
Here’s a quick breakdown of each key stage.
| Stage | What to Do | Why it Matters |
|---|---|---|
| Boiling | Start in cold, well-salted water | Ensures even cooking from the inside out |
| Timing | Boil 15–18 mins until fork-tender | Prevents under- or overcooked potatoes |
| Draining | Drain fully, no water left behind | Excess water ruins creaminess |
| Drying | Return to the hot pot for 1–2 mins | Evaporates moisture for better absorption |
| Mashing: Hand Masher | Press firmly in even strokes | Rustic texture, slight lumps remain |
| Mashing: Ricer | Press through for lump-free mash | Smoothest, silkiest result |
| Avoiding Gluey Texture | Never over-mix or use a blender | Overworking breaks down starch cells |
How to Achieve Ultra-Creamy Texture
The creaminess comes down to three things: dry potatoes, warm cream, and restraint.
Always steam dry after draining. Add butter first and let it fully coat the mash before any cream goes in.
Stream the cream in slowly, stirring as you go.
Stop the moment the texture turns silky. Over-mixing is the fastest way to ruin a good mash once the starches have broken down; no amount of butter can bring it back.
Serving Ideas for Different Meals
Creamy Yukon Gold mashed potatoes work hard at the table. Here’s how I serve them across different occasions.
1. Sunday Roast
Pile roasted chicken alongside and pour the pan drippings straight over the top.
2. Holiday Spread
Serve in a warm bowl with a well of butter in the center and fresh chives scattered over.
3. Weeknight Comfort Meal
Spoon next to braised short ribs or a simple seared pork chop.
4. Shepherd’s Pie Base
Use the creaminess as the topping layer, which holds up beautifully under the grill.
5. Soup Side
Serve a smaller portion alongside a thick bowl of tomato or French onion soup.
6. Breakfast Hash
Leftover mash fried in a skillet with butter until golden and crisp at the edges.
7. Steak Night
A classic pairing rich mash, a good sear, and something green on the side
Storing, Freezing, and Reheating this Recipe
Storage
- Cool completely before transferring to an airtight container.
- Keeps well in the fridge for up to 4 days.
- Press a layer of cling wrap directly onto the surface to prevent a skin from forming.
Freezing
- Portion into freezer-safe bags or containers before freezing.
- Freeze for up to 3 months without any texture loss.
- Label with the date, frozen mash all looks the same after a week.
Reheating
- Reheat gently on the stovetop over low heat.
- Add a splash of warm cream or milk to loosen the texture.
- Stir frequently to bring it back to a smooth, even consistency.
- Microwave works in a pinch cover and heat in 30-second intervals, stirring between each.
- Never reheat on high heat; it dries the mash out fast.
Recipe Notes!
Yukon Golds vary in size, so weigh them where possible rather than counting.
Always warm your cream before adding cold dairy tightens the mash quickly. A ricer is worth the investment if you make smooth mash regularly. Salt the boiling water until it tastes faintly like the sea.
Butter quality matters here; a good unsalted butter makes a real difference in the final flavor.
Leftover mash thickens overnight, so add a little extra cream when reheating.
Taste right before serving, not just during cooking, seasoning always needs a final check.
Frequently Asked Questions (FAQ’s)
1. Are Mashed Potatoes Good for Diabetics?
In moderation, yes. Yukon Golds have a lower glycemic impact than russets; portion size and toppings matter most.
2. What’s the Best Way to Cook a Yukon Gold Potato?
Boiling in cold, salted water until fork-tender gives the most consistent, creamy result every time.
3. What Spices Improve Yukon Gold Flavor?
White pepper, roasted garlic, nutmeg, and fresh chives complement the buttery flavor without overpowering it.